Monday, June 14, 2010

A Slight Diversion - A Greek Hoplite Helmet, Part 2

When we last left off I had the basic shape and color down, but I wanted to experiment more with the horsehair crest and the nose guard. I was also thinking about the cheek guards, but I decided that I did not want to over-engineer this one.

Let's start with the nose guard. I want to give it a little more of a three-dimensional look, so I used a simple flat toothpick and glued it where I had previously painted it on.


While the glue sets, I went on to the horsehair crest. I wanted to try an alternating color, as I always have one heckuva time painting it evenly by hand. In this case I cut pieces of white and black yarn and glued them with Glue Gel to the  wooden comb (painted red in the picture). Once the glue had dried I used a fine point to 'comb out' the yarn and unravel it.


In order to shape the crest I soaked the yarn in a little bit Glue Gel to stiffen it up and keep it in place. Not too much glue, as you don't want it to be hard. You just need it firm enough to be able to cut it.


As you can see, with it stiffened, it cuts nicely with sharp scissors and has a nice shape. I also added a piece of yarn hanging down for a horse tail.

The last two pictures also show where I had gently sanded and cut down the nose guard so it is thinner at the top and thicker at the bottom. Time to paint that like the helmet, comb out the horse tail, soak it in glue, and cut it. Here is the finished Corinthian helmet.


That was a lot of fun! But, now I have to return to my French Napoleonics. To the guys on the Wargaming on a Budget forum on Yahoo: no more intriguing "how would you do this?" type questions, okay? : )

Sunday, June 13, 2010

A Slight Diversion - A Greek Hoplite Helmet, Part 1

So the call went out on the Wargaming on a Budget forum for how to make helmets for ancient warriors, like a Greek Hoplite. I have been wondering how to do this myself, only using a method different from Matt as I wanted to use my beloved pawns as the basis for the figure. So I described how I would start with a section of dowel and a rounded-end button plug...

Matt made a good point that it sounded awful complicated and that he wanted something more "out-of-the-box".  So, I went back to the drawing board. The only reason to add a helmet to the head of a pawn is because you want more bulk or you want to change the shape slightly. I was willing to sacrifice accuracy for simplicity [1] as long as it saved time.

I decided to try my hand at a Corinthian helmet. Basically there are a few key items that define it:

  1. The line coming to a point on the forehead, running around the helmet, essentially dividing the helmet into two pieces: the 'bowl' at the crown, and the guards at the cheeks, nose, and back of the neck.
  2. The guard at the back of the neck typically had a flair where the metal was rolled.
So, going on the assumption that I would not need to change the shape of the crown of the pawn, I decided to use string to define those lines. Here is the process I used; you can tell me whether I succeeded or not.

Start by making a '+' with a drafting pen (using permanent ink) on the top of the pawn's head. This will become critical in making the left and right symmetrical. Carry the lines down to the bottom of the head.


Draw the point on the forehead and slope it down and to the back. The slope should be just over the ears. Rough out a shape for the face by defining the nose guard. Add the cheek guards. Finally, rough out the shape for the ears and the neck guard.


Now dab some Gorilla Glue Super Glue to the point on the forehead and affix some thin packaging string. For figures smaller than 40mm you may need to use thread. Using Elmers School Glue Gel run a bead along the lines you've drawn. Using a small amount of Super Glue, you can set the Elmers quickly. Don't worry about the mess; we'll deal with that later.

Do the same with the neck guard. It only goes from the back of one ear to the back of the other. Make sure you harden the ends with super glue as we will need a firm surface when we trim it with an X-Acto blade later, so soak the string in super glue.


Use a piece of scrap craft stick to make the comb (the holder for the horsehair crest). My larger sanding drum for the Dremel fits the shape of the head near perfectly. Using the line you drew earlier, make sure you align the comb fore-and-aft.


Yes, I know at this point he looks like someone who has a board for a Mohawk or Steve Martin trying a new gag. You might be tempted to just use the craft stick for the whole comb and crest and let the paintbrush separate the two. I wanted to experiment a little more, so I decided to use the sander and trim this down to a comb. I started by cutting it down with wire snips, then using the sander.


I used glue gel set by super glue to fill in any cracks or gaps between the comb and the head. After it all dries, go back over with an X-Acto knife with a fresh, sharp blade and bevel the ends of the string and cut away any excess blobs of glue.

Now for the painting. We roughed out the shape using a pen, but will use a black undercoat to define the actual edges, so here is where you can correct your mistakes, if any.


I usually use Google Images to find ideas. Here is a search for Corinthian helmets so you can get an idea of shapes. The eyes should be pointy-er and the cheek guards point down past the chin. Oh well, maybe on the next one.

Here is a picture of what it looks like painted, before I put on the crest.


As you can see from the side view, it is a real Cartman-style face. I'll try and fix that next time with a more three-dimensional nose guard. We'll also see what happens when I try to make a horse crest out of yarn. Finally, I may decide to do something about adding a third dimension to the cheek guards.

End Notes

[1] Making a unit of 20 French all at once has made me appreciate cutting down as many steps as possible. It is fine to hand-craft parts for a figure when you are making figures for a skirmish game (i.e. 20 figures per side, at most), but when 24 figures forms the basis for one unit on a side and you need eight or so, it changes your approach.

Friday, June 11, 2010

Making them perfect

As I was reviewing the troops on the painting table I realized that, due to drawing and painting the details on free-hand, there was a lot of variation. For example, so cuff flaps are longer, some lapels wider, some coat tails fatter and so on. So I got to thinking about that and how I might do a better job of making them more uniform, when I read the following passages from Uniforms of the Retreat from Moscow, 1812 by Philip Haythornthwaite and Michael Chappell:
"To determine the uniform worn by a regiment at a particular moment is never easy; to do so for 1812 is difficult as that year saw a general redesigning of the costume of several European armies. Early in the year both France and Russia issued new clothing regulations which altered the appearance of much of the army, though it should not be assumed that because a uniform was introduced on, say, 1 January 1812, it would automatically be worn from that date. Firstly, the new style would usually only be adopted when the old uniform wore out, for simple economic reasons, and secondly the change could be delayed for months as it was often impossible to send the new uniform to units spread over vast areas of territory, or to have them made locally.


Because one member of a unit is known to have worn a certain uniform it is incorrect to assume that all his fellows did likewise, as the system of sending drafts of men to existing units often resulted in more than one pattern being worn even within the same company.


It is only half correct to describe anything as '1812-pattern', as uniforms were not produced by the same factory. Often local tailors with limited knowledge produced garments from the scant written instructions available, consequently achieving their own interpretation of the official pattern. In some cases regimental commanders deliberately ignored the regulations, many designing their own uniforms (particularly true of the Staff, Murat for example) and regimental musicians were often dressed according to the colonel's whims.
So, that actually made me feel better. Draftees, variations from local tailors, variations from different factories, variations directed by the Colonel, and even looting the uniforms of your own dead from other units could produce variations within a single company.

Back to painting. The uniforms are getting their final touches and then I will produce a tutorial with pictures before moving on to the faces.

Wednesday, June 9, 2010

Quick Update

I have been painting up a storm, trying to build a 24-man unit of French ligne (picture of original here), so I have not been gaming or blogging much. I have painted the basic uniform - coat, lapels, trousers, cuffs and such - and only have the faces, shakos, bearskins, and muskets to paint. Everything else is done.
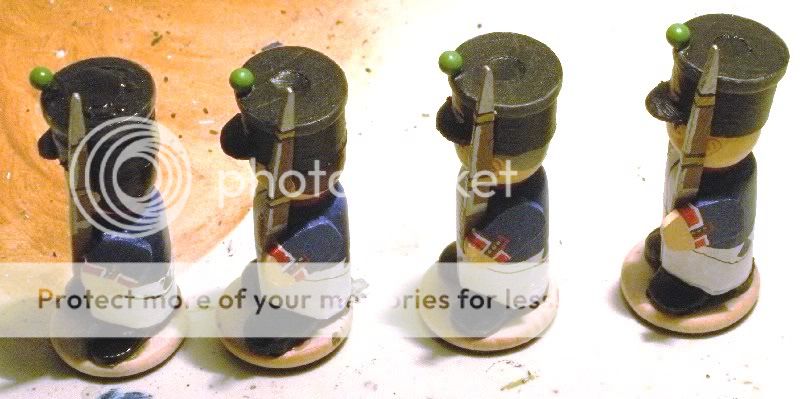
I'll try to post a progress picture soon. I have been taking pictures all of the while in order to come up with a painting tutorial. I started from the point where the figures are built and glued, so it should be rather comprehensive. With the building and painting tutorials out of the way, the next would simply be showing progress on the different types of figures that I build and maybe some techniques when I build something different (like hussar pelisse's, Polish hussar wings, etc.).

Sunday, May 30, 2010

Making Feet Faster

In a previous blog entry I went over the process of making feet for the infantry man and one of the last steps is putting on the modeling material to give the feet mass. Currently I am making a batch of 20 infantry man and it was while putting on the modeling material that I struck upon a slightly easier method.

One of the items I noted was using a sculpting tool to shape the blob, but I also use an X-Acto hobby knife to remove excess material. I've since found that it is easier to shape the blob, but not cut off the excess right away. I let it harden a bit - say waiting at least an hour - and then come back with the knife and cut off the excess. This does two things:

  1. Makes more of a cut, rather than a tear, of the material.
  2. Less chance of the whole blob popping off of the wood as it has had some time to adhere to the surface.
A simple tip, I know, but it is actually a time-saver and less frustrating.

Wednesday, May 26, 2010

Infantry Tutorial Continued - The Musket

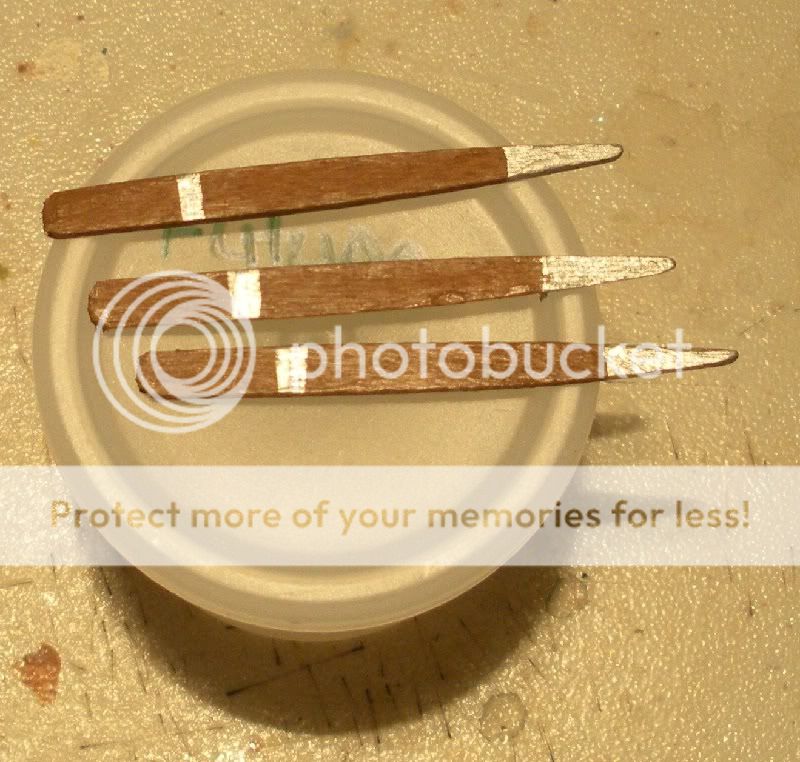
Making a musket is pretty easy, as it is simply a flat toothpick. In the craft store you can get about 250 for $3. I like them a little better than the kitchen ones as they are wider; just the right size for my 40mm figures.

Start by measuring out 1 3/4", starting from the point. The pointed end will be the bayonet, the other the butt.


You can round out the flat end a little if you think it looks better. I do it just to get rid of the ragged edge from the cut.

Paint all but the pointed end a brown wood color.


Now paint the pointed end a steel metal color. In this case I used Game Workshop's Chainmail.


Now paint the firing mechanism the same steel color. A simple rectangle will do; nothing fancy. This goes on only one side, the right.


Now paint the gun barrel. Paint both sides and the top.


A musket has metal bands that bind the barrel to the stock. To pick these details out a little, paint two black bands all the way around. Some muskets have more, so if you want to be historically accurate, do your research given the type of musket and the period.


I use a brass color for the bands to add contrast to the steel. If you want to be historically accurate, research out the proper color (usually either brass or steel). Paint the color inside the black band, leaving enough black to highlight the detail. Use a smaller brush than you used for the black bands and it should be no trouble.


That's it! Very simple, but effective. No need to get more detailed as we are going for the effect. Gluing the musket to the hand should be sufficient.


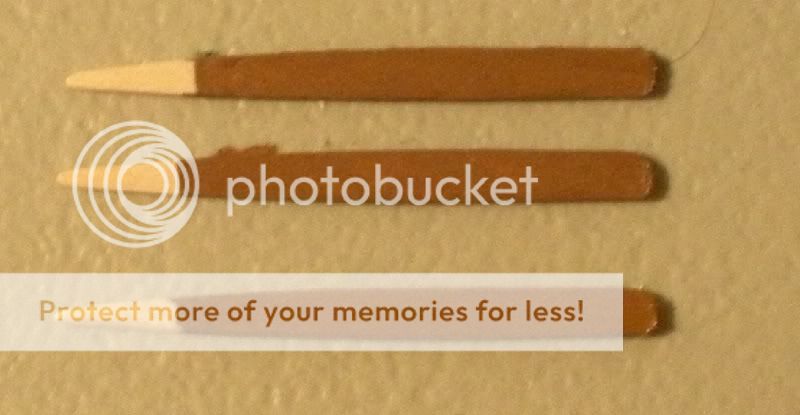
As you can see, here they are with a batch of French Fusiliers. I need to photograph them a little better, but that will be next time. The wife is crowding the table where I take pictures, so I can't do it tonight.

Monday, May 24, 2010

Finished a batch of French Legere

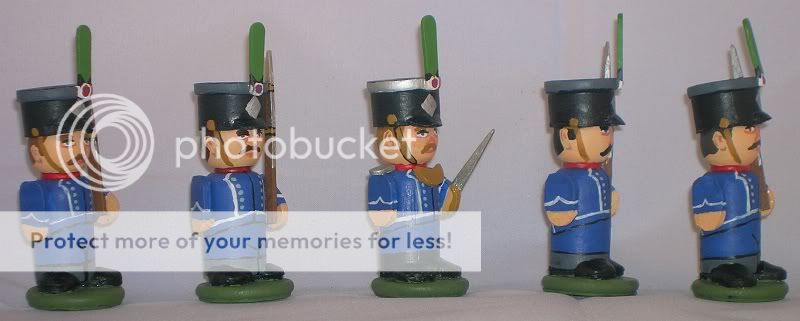
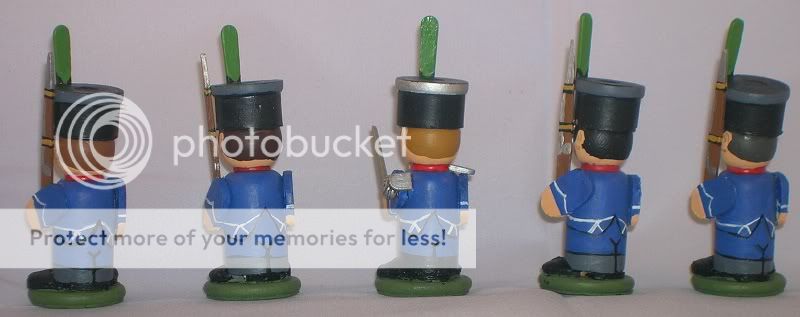
I want to get the tutorial up regarding the "little bits" of the figure - musket, sword, epaulettes, and plume - but I needed to push myself and finish a batch of French Legere for when Command & Colors: Napoleonics, by GMT Games, ships. So, here they are:


You can see I have been practicing doing different faces, so they have a bit of character. The officer in the center has a gorget around his neck. This was made just like the brim of the shako (see that tutorial).


Here you can see details like the pointed cuffs, the sword, chin straps, etc.


Here you get a better idea of the different hair colors I used. : ) Also, you can see the detail on the muskets.

I really love these little guys. They are fun to make and paint; I just need to stop obsessing over certain details. On the table they will look great, I think.

I'll try and post the mini-tutorial on the "little bits", then start on a painting tutorial as I do the next batch of figures. I really need to start grinding units if I want to make my deadline for the November 2010 ship date.

Contributors

Followers

Blog Archive

Popular Posts

Labels I Use in Posts