Showing posts with label tools. Show all posts

Saturday, September 30, 2023

New Material Cutter

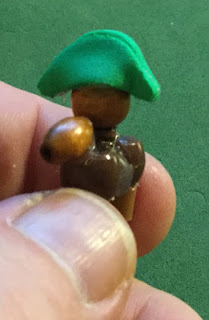
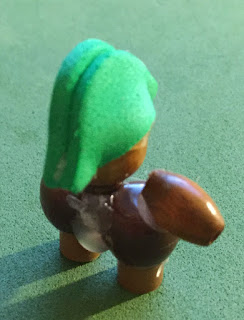
Looking at Matt's latest creations I can see that Matt and I have different styles. Whereas I see Matt's style as more 'pure' (unadulterated wooden craft parts, with added pieces of plastic and paper), mine uses more digital assets, unless I am making minimalist miniatures, like the little guys below.

It really started in 2010 when I started printing details onto paper using an inkjet printer, to save me from painting fine details that make up a Napoleonic British line infantryman.

In 2016, I bought a Cricut Explore 3, which is a desktop cutting machine. You feed it a drawing and rather than printing the design it cuts it out. I used for a lot of parts that I used to craft from wood, such as arms, legs, bicorne hats, plumes, axe blades, etc.

One day I was curious about whether my Cricut could cut a particular material and I found a page on the Cricut website showing all kinds of materials I did not know it could do. It could do 1/16" basswood!

Unfortunately, I was on a page showing what the latest model could do, not what my model could. Nonetheless I tried the custom settings it was recommending and, although it scored the wood pretty good, it did not cut it all the way through. The custom settings allow you to make multiple passes, but no more than nine. Running the job twice seemed risky as the material doesn't need much shifting in order to mess the second job up. No, the only thing to do was to retire my seven year old machine and buy the latest model!

By the way, if you have read my older stuff you know that I have a laser cutter, so why am I looking for a heavier cutting machine, you might ask? Well, the laser does not do well in the heat and the building where the laser is housed has no air conditioning. Oh, and I live in Arizona. I cannot bring the laser into an air conditioned house because of all the smoke generated by the cutting, so…

So, I bought the new Cricut Maker 3 from Amazon (that is an affiliate link; won't cost you anything more, but gives me a penny or so). So far the results have been mixed, but getting better.

The first thing I tried was my basswood cutting project. It failed. I kept getting a 'Blade not detected' error no matter which blade I put in. So, I backed up a bit, followed the Getting Started instructions, and started over. I updated the software and tried a calibration test. Failed with same error. I tried the sample project and it worked. I then decided to try one of my old craft foam projects and it also worked. Looking up.

I called tech support and was greeted with an expected call wait time of one hour and 40 minutes. Eventually it let me leave a voicemail and they did, in fact, call back. Told him everything I did, including reinstalling the software (which the website suggested) and told to send in a video. As an aside, because this machine is on the internet they were able to see it, despite the fact that I was connecting to it via Bluetooth. Nonetheless, they could not diagnose the issue.

I did some more testing today. I tried cutting chipboard (1.5mm thick), which I could do with the other machine, using custom settings. With this new machine the material is already in the list to pick; no need to set custom settings. It also failed with the same error. This was when I noticed that the material from the pick list has a special icon, indicating a 'smart' material. I noticed they had Mat Board (1.5mm) as a material and it did not have that icon, so I tried that and it worked! The blade was recognized. I decided to try and create a custom material, with the exact same settings, and see if it would work. It also did!

It seems like the special icon indicates settings that you cannot set when defining custom materials, i.e. more pressure or more passes of the cut. Something I am sending to tech support. So I am still debugging it, but I am back up and running and far as grinding out foam and chipboard parts, just not basswood parts yet. I can probably switch to balsa wood though, but that is too fragile for gaming, even if I soak it in Future floor wax or superglue.

So, am I happy with the purchase? Actually yes. One feature of the new model was faster cutting, and that is true.  Also, the software can now be downloaded to the computer instead of running only in a browser. Does it cut wood? Not yet, but I am sure that it will when the issue is resolve (or they send me a new unit).

Until then, I have more Dark Ages soldiers to build.


Saturday, July 9, 2022

Revisiting Napoleonic Shakos

First off let me start by saying sorry that I have ignored this blog. If you read my Dale's Wargames or Solo Battles blogs you know I have been active over there, playing a map campaign in a fictional 1750 country and Marvel United, but not much in the way of this hobby.

I have written Matt (my co-author on the blog) and he is doing fine. He has done some RPG gaming (which he switched to online during lockdown) but has mostly been painting figures. I rotate hobbies (gaming, computer gaming, painting, terrain making, miniature making, laser cutting, etc.) too, so I understand how it goes. It all comes around in the rotation eventually.

Revisiting the Napoleonic Shako

One thing I have always contended regarding making figures is that, because we look at our figures on the table from above and behind, the hat of the miniature is one of the most important shapes to get right. It is how we generally identify what the figure represents, more so than probably any other part of the figure, save maybe color. The smaller the figure though, the less distinct the shape becomes and the more color is important. (When the figure gets too small, such as 6mm, they all just become blobs of dark color, so mass becomes more important.) Because I am building 42mm Napoleonic figures, the shape of the hat, or shako, is important.

Way back in May 2010 I built my first 42mm Napoleonics figures, on this blog, showcasing it on the Wargaming on a Budget forum on Yahoo (where I also met the group's creator, Matt). You can see the steps to making the shako were fairly involved.

  1. Take a wooden (thread) spool and cut it in half.
  2. Hollow out the inside of the half spool so it fits on the pawn's head.
  3. Create a brim (peak) for the shako and glue it to the shako.
  4. Plug the hole of the spool.
  5. Add a pom pom to the shako.
     

Eventually I purchased a hobby mitre chop saw and I simply chopped the top of the pawn's head so that I could glue the half spool to the top and the pawn and skip the 'hollowing out' step.

So, what's wrong with this process? Using a small chop saw on a spherical wooden piece was not always a clean chop. If you put the pawn in the mitre saw's vice even slightly off the level horizontal line, the shako would cock at an angle. Cutting the wooden spool in half was even more problematic as it would slip in the saw's vice. I ended up making a jig in order to get a better grip and to ensure that I cut the spool evenly in half (yet a third problem).

Enter the Laser Cutter

When I purchased my laser cutter the first projects were all utilitarian, i.e. I made a bunch of paint racks so I could organize my paints. The first few attempts at terrain were less than aesthetically pleasing. I started casting about on Etsy for SVG files to see what kind of projects I could buy and make. There were some interesting ones, like skyscraper buildings, cabins, and a tank. It was that last project, making a T34 tank, that made me look at laser cutting projects differently.

The T34 Tank Project

I purchased an SVG file that defined a tank 'puzzle', which looks something like the below image.

This image is of the tank turret. The black lines are where the laser cuts and the red lines indicate the laser only scores the wood (to create details, such as tank hatches). Basically the file contains 3mm thick layers. The pieces on the left are at the top and as you continue right you get the next layer down. The two pieces on the right create the 'cross' piece that holds four layers to the left together, making it easy to line the pieces up.

The Shako Project

This style made me wonder whether I could create a shako using this same layering method. Also, I intended to use the laser to cut out the arms, legs, and other accessories rather than requiring I craft them manually from craft sticks.

I created an SVG file (using Boxy SVG, an excellent SVG editor for the Mac, Linux, and Windows) shown in the image below.

  1. This is the base of the shako, with the brim. The inner circle is removed so that it slides over the head of the pawn. This layer is 3mm thick.
  2. This is the next layer of the shako, also 3mm thick. The inner circle is also removed so that it slides over the head of the pawn.
  3. This is another layer of the shako. By this layer you no longer need to cut out the inner circle as it is above the top of the pawn's head. There are multiple layers in order to increase the height of the shako.
  4. This is the top of the shako. Note that it is slightly larger than C so that it is wider than the shako body, simulating the lace at the top of the shako.
  5. This is the pom pom and plume that is affixed to the front of the shako.
  6. This is the left arm of the pawn, if the figure is at a right shoulder arms position, or the right arm if at left shoulder arms.
  7. This is the right arm of the pawn, if the figure is at a left shoulder arms position, or the left arm if at right shoulder arms. It would hold the musket. (In the future I will include the outline of the musket itself.
  8. This is the pair of feet for the pawn.

Now it is just a matter of assembling the 'layers' of the shako and adding the arms and feet.


It looks like I may need to adjust the length and width of the feet, but they don't look bad. Now for the shako.

Note that even though the pattern has three solid layers and two with center cutouts, I only needed two of the solid layers for this French-style shako. Note the top layer is slightly larger and given a 'lip' around the edge. This represents the shako lace.

Add the plum jazzes up the shako and the arms complete the figure. At this point I could leave it as is, or I could take a Dremel with sanding drum and thin out the shako brim, round the edges of the feet and arms, and shape the shako plume. Because my goal is to minimize the build process, I am going to try this first unit straight off of the laser.

What do you think? Is using a laser cheating, because I am not crafting all of the parts anymore, or is it simply a tool that reduces the time to manufacture the figure? (I feel it is the latter, especially as I created the SVG file of all of the pieces.)

Now that the proof of concept is proven, I am going to change one of the arms to hold a musket shape and make a backpack shape (maybe even using scoring to make some details?) and a cartridge box shape.


Sunday, January 24, 2021

I Received My Dream Tool: A Laser

This was long overdue, but as I head towards retirement (three more years) I decided it was time to stop procrastinating and to buy a dream tool that I had been pondering for a long time: a laser cutter and engraver. Now you might be wondering why this is on this particular blog and the answer is because it will absolutely play a role in cutting out parts for my wooden warriors.

In the past I used a Cricut cutting machine to cut out arm shapes and Spanish bicornes from craft foam sheet and, although I liked the flexibility of the material, I did not like how it took paint. With a laser I will easily be able to cut out shapes in 3mm and 1/8" thickness.

Right now I am in the experimental phase. I have long drawn images for wargaming using various drawing packages on the Macintosh. I bought the Glowforge Plus and it accepts SVG format files as input for 2D work, i.e. cutting and scoring. I have been using Inkscape for years, and that saves in many of the formats that the Glowforge accepts.

My first experiment was creating a painting rack for my paints. I use Pro Acryl mostly right now and they have a large bottle size than the craft paints and the Vallejo/Army Painter sized bottles, so I thought I would cut out my own as an initial project.

The laser in action.

I looked at other paint holders and I noticed that many have the paint bottles standing straight up and down. The better ones stack one on top of another. I didn't really want that kind. I wanted the bottles angled and showing the color as much as possible.

The top of the holder.

The top plate of the holder has holes slightly larger than the bottle's diameter (30mm) so the paint bottle can slide in comfortably.

The sides of the holder.

I decided to cut out two of these sheets so I could double up on the sides and make it stiffer.

The bottom of the holder.

The bottom has small holes so the bottle's tip could slide in.

The finished product.

I really like how I can see all the colors so easily. It takes up a bit of space, but I don't want stackable holders where I have to unstack them to remove a paint bottle and I am tired of having to pick up bottles to look at the color from holders where the bottles stand straight. If I were afraid of the bottles leaking I could still reverse them (tips up) and see the colors while being able to easily grab the bottle.

The different cuts.

This was a really instructive project and I look forward to doing more. Right now all of my projects are more war-game accessories and the like. I am strongly considering continuing to use the 3mm chipboard as a replacement for craft foam sheets (although I have a ton of it still).

Wednesday, December 14, 2016

Early Christmas Present: a Cricut Cutter

I received a new Christmas present from Santa Amazon the other day: a Cricut Explore Air 2. (By the way, it is not pronounced "cry-cut", like I thought, but "cricket".) So what is it? It is like an old plotter only in addition to plotting (using drawing pens) it also scores and cuts designs out of craft materials like paper, vinyl and – if you get the deep cut blade – foam sheet.


Because it is Air-compatible you can print from your computer over Bluetooth. So naturally, with the Spanish 1808 project ahead of me, I decided to grind out some bicornes. First, I created a digital version of the plastic template I made.


The Cricut comes with its own Design Space software which runs in your browser. I was using Google Chrome on a Mac and had no issues with the software. After creating an account, logging in, and creating a new project, you upload the image into your project.


The graphic came in oversized – this is typical with this type of software – so I resized it. As you dragged the resize handle it automatically kept the shape proportion, so nothing fiddly there.

I then copied and pasted in several more bicornes to fill up the page. Note in the graphic about that the shape is intended to be cut out (the little scissors icon). It took me a while to figure that one out. My first attempt it kept trying to print the shapes.


There are a number of things you can do with a shape. Coloring is so that you can discern different shapes on different layers. You can also mix and match action by having some shapes cut and some score. This is useful for paper modeling, which needs to support both.


When you hit the 'Go' button it brings up a preview screen. As it turned out, meticulously positioning all of the shapes did not matter; it rearranged them to maximize use of the page. I think it was able to do this because I was choosing an odd size (4" by 6") and because everything was on the same layer.


I positioned my foam sheet on the adhesive mat provided. Note that the mat is gummy and designed so the material stays in place while the cutter is operating. Note the damage I have already made to my new mat with scribbles and cuts on it already.


Once everything is ready, you click the 'Go' button on the screen. The 'Load' button on the Cricut flashes, so you press it and the mat and your material is pulled into the machine. (Note: the mat moves forward and back; the cutter only moves left and right. This machine needs a lot of table space!)


There is a knob on the Cricut to indicate how thick the material you are cutting is. Initially I set it to the highest value and I noticed some tearing. I paused it in the middle and reset the thickness to 'Custom' and then the cuts smoothed out. After I finished the job I could see yet more cuts in my mat from where I had the setting too high. All of the bicorne halves popped right out of the sheet, however.


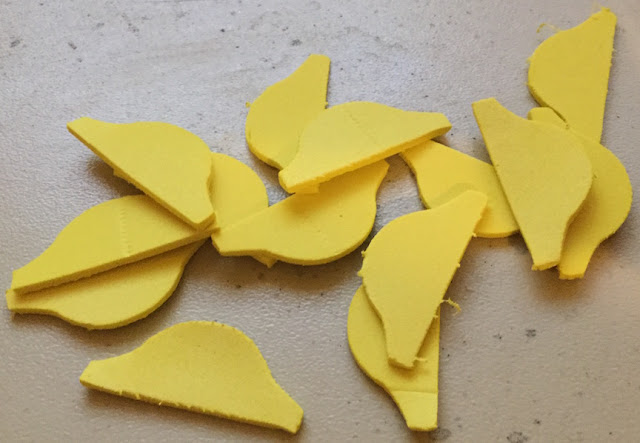
A little bit of trimming for those first ones with a pair of sharp craft scissors will get rid of the jaggedness. No worries. You can see the one in the bottom center has a dent where the roller went over it. This might not be good if you need both sides of the foam to look pristine, but if one side is not shown, the end result will be fine.

So in the span of a few minutes of cutting, I have 14 halves. Enough for seven bicornes. When I get a little more efficient with my cutting, and create a few more digital templates, I should be able to quickly and consistently make arms, legs, weapons, plumes, epaulettes, and more.

I also bought some adhesive backed vinyl to experiment with. I am already thinking about the possibilities there.

UPDATE: This is why I cannot complete project! I cannot leave well enough alone. Rather than simply being a bicorne factory for my 42mm troops I start wondering. What if I scale the size down even more, can I make a bicorne small enough to fit my 12mm troops? Can the Cricut cut something that small and intricate? Can I glue something that small without gluing my fingers to the model too?

Let's stop wondering and try!


Yup! That is a bicorne on a 12mm bead cavalryman. It may be a little oversized, but I like my figures cartoony and this is still doable with my sausage fingers.

Must ... not ... start ... new ... project!

Wednesday, October 12, 2016

Let's Get Medieval!

I have been reading the rules to Lion Rampant, a set of medieval skirmish rules by Dan Mersey (of Dux Bellorum fame, amongst a number of other rules), and decided to build a "retinue" for it, figuring that it might be a bit smaller in size than one for Cross and Crescent, the Crusades version of Saga. It turns out that it is a little more for Lion Rampant.

A typical starter force for Saga is six points – with one point being either a unit of 4 Hearthguard, 8 Warriors, or 12 Levy – so about 45 figures including the Warlord. A typical starter force for Lion Rampant is 24 points – with a six point unit of Men-at-Arms (Knights) being 6 figures, a four point unit of Sergeants being 6 figures if mounted and 12 figures if on foot, and a three point unit of Yeomen being 12 figures – so about  66 figures.

So I decided to aim for units of 6 for the Men-at-Arms and 12 for everything else and this would allow me to use the units for either set of rules.

I wanted to start with the Knights (of course), and of them, the Warlord (Saga)/Leader of the Men-at-Arms unit (Lion Rampant). As I work through the unit I will show you the variations that I make of the figure, but this particular model, being the leader of your forces, had to be different than all the rest.


The horse is standard – three split eggs (front legs, back legs, and head), a large spool (body), and a small spool (neck) – and I have added foam pieces cut out with jagged-edge craft scissors to make the mane and tail. (You can see the scissor I am referring to in this article about experimenting with foam sheets.)


The figure is the typical "boy" pawn that I use, which is 1 5/8" tall. I completely cut off the "head" and replaced it will the top half of a spool. I also cut off a length at the bottom that represents the legs as I attached wooden "legs" to the side of the horse.

The lance/spear is a simple dowel – either 1/8" or 1/16", I forget – and I used a pencil sharpener to get the initial point following it up with a Dremel sander to make it a proper spear head. I may add a vamplate above the hand later. (I need to research when they came into common use.)


This view shows the horse's arse a little better, and the tail I cut out of foam. You can also see a bit of detail I put on the saddle. I simply painted a brown leather rectangle  on the figure's back and then added studs using a silver Sharpie. (I love the metallic Sharpies. I used them on the crown too and face too.)


I thought about using small wood rectangles to make the armor plates that protect the eye slits, but felt that given the small size it would be too fiddly. I simply used a fine, black Sharpie to define the plates, slits, and air holes in the helmet.


Here is a shot comparing the Knight to an old, very chunky, Citadel 28mm soldier. (I think he was from Heroquest.)

Tom Foss from Wooden Wars (Skull and Crown) was kind enough to send me one of his wooden figures that he cuts and engraves with his laser cutter. (Where is that "envious" emoticon?) and one of the things I was intrigued by was his use of layering wooden parts. I will go into more depth on the subject (probably after I come back from my business trip), but I wanted to show you a small experiment.


Essentially what I did – shown in the pictures of the left hand, above and below – is glue a small wooden piece on a shortened wooden arm. That allows me to add just a touch of dimensionality to the hand. (Note that I sanded a bevel where the two pieces met in order to make it look a little better. What can I say? I am a sander.)


Unfortunately (for my hobby), I will be going on a business trip for two weeks starting on Oct 17. So I will not be posting any articles until after I return. (The hotels complain when you get wood dust all over from sanding and get hot glue on the desk.) Matt will carry on for the both of us while I am gone. I may be able to finish my Sergeant-at-Arms before I go, but I am not making any promises. But if I do, I will be sure and post it before heading out.

A Blast from the Past

In an email to Matt (the blog's co-author) I was reminiscing about how it all started for me: making my own medieval miniatures as a kid. All I had was index cards, a LOT of beads of various sizes, white glue, scissors, pliers, and some old plastic sprue. From that I made Knights. They were my first miniature figures because that was all I could afford. (Sadly, I cast them all aside when I could finally afford Airfix figures.)

I decided to try my hand at making some of my old "Bead Knights".


I modified the design a little. I used a round toothpick for a lance (I have no idea why I did not think of that back then) and the end of a flat toothpick for the shield (I used index cards back then).


With the hot glue I can fill the gaps just as I did back in the day, but now it hardens much faster. No attempts to make arms or legs here; that will all be done in paint.


Here is a comparison shot with that old Citadel 28mm foot soldier. In terms of body mass, they are closer to 20mm or 25mm figures, but from "foot to eye" they are more like 12mm.

The more I look at them, the more I think this might be a really nice way to build a mass army. Very simple construction. Very fast to paint (because you really can't put too much detail in). I just might make an army of these, for nostalgia's sake.
Funny story (at least to me). When I showed my "Bead Knights" to other people – who happen to have large figure collections, much of it well painted – I always received a polite smile, but nothing else much. No one wanted to use them, of course, because they were "out of scale" with everyone else's troops. One day I read the article in Miniature Wargaming about Andy Callan's "Hair Roller Armies" and I remember remarking "why would anyone want to game with armies made from hair rollers?" One of the guys who always smiled politely when I was gushing about my Bead Knights snapped "why would anyone want to game with Knights made from wooden beads?" That was my first indication that not everyone else thought this was a cool idea.
But you know what? I still love the look of these little guys. Especially when you paint them up.


(Sorry the first picture is fuzzy. He was riding by too quickly.)

I wanted to recreate the Bead Knights of Yore as they were then. I had a limited selection of beads, so I used what I had. If I did it today, the crafter in me says that I would use a cone-shaped bead for the horses head and include a small bead to act as the horse's neck! I tell you, there is something enticing about the figure. I could see using figures like this for grinding out a mass ancients or medieval army because the scale forces you to paint only the most obvious items and leave the rest to the imagination.

One Last Thing

Way back when I showed the prototype of a Polish Winged Hussar. Well I ran across the unfinished figure and worked a little more on him.


You can see that the figure, in comparison to the 28mm figure, is just as chunky, but a little shorter. (It is harder to tell as one is mounted and one is not.) Construction is relatively simple, but tedious to work on. The figure is, from top to bottom, a mushroom plug (or button plug), a rounded top plug, and a spool. The tedious part is that the spool had a large about of wood removed in order for the rider to straddle the horse's body. Unlike with my Knight, the body and legs are all one piece.

Let me tell you right now that I make a lot of prototype figures, just for fun, never intending to make multiples of the figure. I just want to see if I can make something. This is one of those figures. Not only because it is a complex figure and it would take a long time to get a decent number of figures built for a single unit, but also because I would have no other figures that would go with it (especially at that scale). Finally, and probably the biggest reason: I have a large number of painted, 15mm Polish Winged Hussars already, and they go unused.

I will definitely finish the figure and paint it up though.

Contributors

Followers

Blog Archive

Popular Posts

Labels I Use in Posts