Showing posts with label painting. Show all posts

Wednesday, October 25, 2023

Dark Ages Two-Handed Axemen (Minimalist)

Dark Ages Two-Handed Axemen

I've started painting more figures for my minimalist Dark Ages army. This time it is armored warriors with two-handed Danish axes.

Sorry that the close-up is a little blurry!

Front and side views.

It was a moderately complex build, but it required very little modification to the component parts.

Here are all of the components to the figure.

The figure consists of the following components.

  • The head and helmet is a button plug, also called a mushroom plug. It is a plug for holes and is used in furniture making.
  • The body is a cylindrical, plastic bead. I would prefer wood as the paint sticks better, but I cannot find a cylindrical one that is the right size.
  • The feet are a polymer clay 'bead' that I picked up at Hobby Lobby. Because it is a flat disk it works well for adding height, and the polymer clay is very easy to cut with a hobby knife to shape.
  • Because I use a lot of toothpicks as spears for my other Dark Ages warriors, I end up with a number of wooden scraps as I only use the pointed ends.
  • Finally, I found a smaller, flat, polymer clay bead that, when cut in half, makes a passable axe blade.

If I have any criticism it is that I need to do a better job of trimming the ends of the axe handle so they don't look like the were squeeze cut with wire snips (which they were). Also, I probably need to put shields on their backs, although that is not strictly necessary.

Another Minimalist Experiment

I have a lot of painted Napoleonic miniatures, but they are all 6mm, and to be honest, they are very hard to discern what they are (Nationality, troop type, unit designation, etc.) so it makes it harder for gaming. Forget about photographing them!

Although I like the two component body design I generally use – a round bead or button plug for the head and a cylindrical or square bead for the body – I want a little more height on the figure. So I continue to experiment with designs with an eye of replacing my Napoleonics, or creating a 'imagination' army.

I started with three flat head plugs. Again, these are used for filling holes in furniture, but being flat-headed, they are intended to lies flush with the surrounding surface. What makes them a 'plug' and not a 'dowel' is that dowels are straight-sided and plugs are tapered.


I started with a 5/16" flat head plug for the body. The widest end is at the top and represents the shoulders.

On top of that I glued a 1/4" flat head plug for the head and hat. If you want a shako, put the widest end at the top; put it at the bottom is you want a kepi.

Below the body glue a 3/16" flat head plug for the legs. The widest part is at the bottom, although I could see putting it at the top also.

Finally glue the polymer clay bead to the bottom of the legs. You can use a hobby knife to trim it to size. It will also give more stability to the figure.

I used an all-material adhesive for all of this. When I am done I will cover it with Mod Podge (glorified white PVC glue) to seal the wood pores – making it easier to paint – and giving more strength to the figure. I am concerned about this popping off of a base, however.

These plugs do not have much of a taper, so the idea of using wood, or plastic tile spacers, for the arms seems like it would take more work trimming off some material so it would lie flush to the body. I would probably use simple dimensional paint for the arms. Definitely will use that for the shako/kepi peak or any ornaments like a shako pom-pom. I would probably drill a hole and use a toothpick if I wanted to go so far as to create a shako plume.

By the way, a round head plug – it is what it sounds like – makes a great grenadier bearskin or round helmet. Flat head plugs also make great Crusader helms.

I used to be concerned about pulling these troops out for public games. Not any more. I may get funny comments like "I am glad to see the mushroom heads are getting some play" or things like that, but I have never had anyone say that would not game because they had to use them.

Saturday, December 31, 2022

Hastings in a Minimalist Style

 If you follow me on my blog Dale's Wargames you will know that I really like the rules Tin Soldiers in Action. One limitation of them is that they only cover 1650 through 1914. I like the core mechanics, but could not use them for other periods. After speaking with the author he indicated that the did expand the range, to include from ancients to futuristic. He sent me the Hastings scenario which has the necessary rules and order of battle to game the battle.

As it happens I have sufficient troops in 15mm metal, but I am actively trying to decide on how to reduce my collection. Although I have decided to keep 15mm as the scale of choice for mass battles, I am considering selling the painted troops I have and replacing them with wooden miniatures. Why? Well I like the creation process for one, and now that I am retired I have more time on my hands. But more to the point, I am concerned that when I pass I will leave my wife with trying to get rid of my collection and trying to recoup some of the money. (If she gives them away it would not be a disaster as she will be well taken care of, but I would probably roll over in my grave.) However, if they are my wooden creations I would neither be upset if they are given away or even thrown away. (Strange, I know.) Besides, I really need to downsize anyway.

With that morbid thought in mind I decided that the Hastings project was a great start to see if I even have the ambition to carry it out.

I decided that I wanted to use the minimalist style that I started some time ago, rather than the larger, more detailed style Matt used for his Hastings project. (I love Matt's stuff, but can't match his paint jobs.)

If you follow the first link you can see how I build these figures. They come out about 12mm tall, but about the chunkiness of 15mm. They have a cartoony 'big-headed' (chibi) style where the upper wooden part represents the head and hat and the lower wooden part represents the torso and legs. (This is how you achieve that chibi look in such a small scale.

Saxon Fyrd

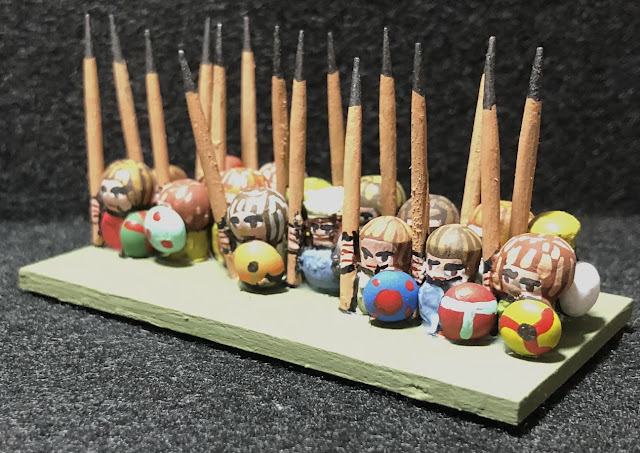
In the image above, I used a mixture of round beads and round head plugs to represent the upper part, and round beads, cylinder, and flat head plugs for the lower part. The shields are ½ a sphere of clear plastic, to represent the shield. As always, spears are made from a standard toothpick.

More Saxon Fyrd

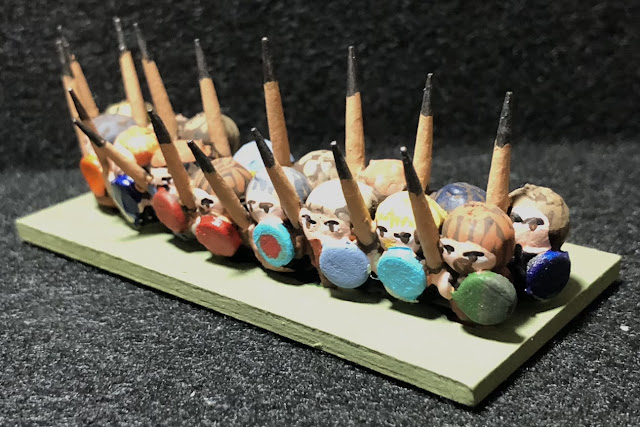
The above are ones that I made and posted about in 2016. (All projects eventually get finished!) They are all round beads for the upper part and square beads for the lower part. Shields are made from thin craft foam using a hole punch.

More Saxon Fyrd

More figures from 2016 that use a small flat 'bead' for the shield. I could never find one the proper size, so I switched to craft foam hole punch shields.

Saxon Huscarls

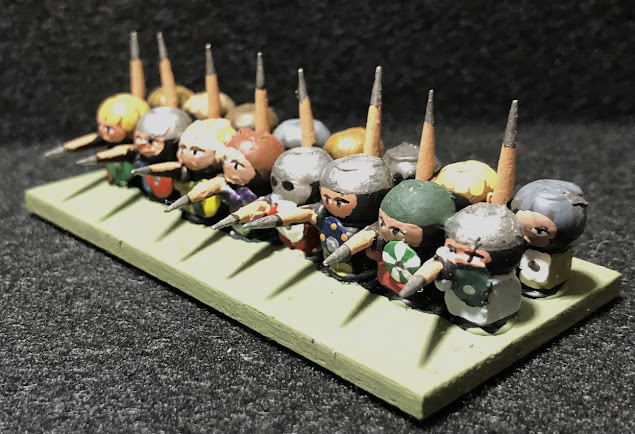
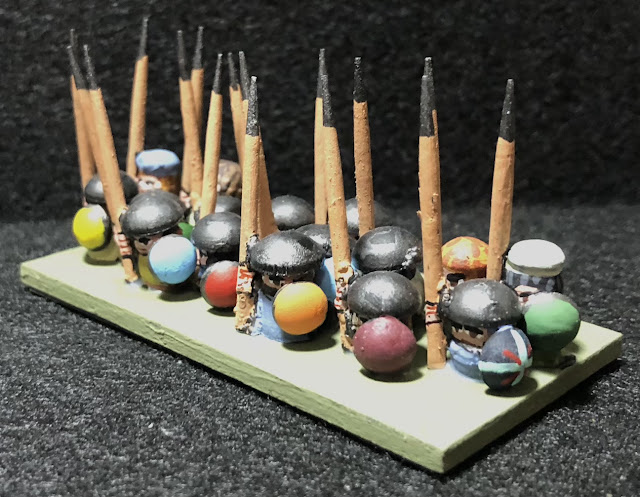
To emphasize the metal helmets, beyond simply painting them a metallic color, I used button (mushroom) plugs. Some figures have a 'Phrygian' cap, like the end figures in the second rank. Here is the look I was going for.

The intent was to use two beads and some filler to simulate it.

The light gray bead is a cylinder. Although mine was square with rounded corners, it would have looked better if it were wider than it was tall. The dark gray was an oval bead, very much wider than tall. Finally, the white represents where I put filler, to try and hide the gap between the two beads at the back of the head, but leave it in the front, in an attempt to give it the 'floppy cap' look. In the end it sort of fails because I always have trouble filling gaps.

As a side note I can see using this same technique to represent a beret, with the open gap to the side and gluing the top bead at a slight angle. I may also have come up with a better gap filler: 'sprue goo'. Sprue Goo is where you take plastic sprue from plastic models, and dissolve it in acetone or plastic cement (acetone and butyl acetate). You can use it like liquid plastic which will harden. I used it in this experiment below to make spear points on the toothpicks. (It worked but was too much trouble.)

Some people ask me: why do you spend all of that time making figures? Isn't it faster to just buy miniatures? My response is always: how long do you think it takes to glue two beads, a toothpick, and a hole-punched piece of foam together? How do you think it compares to removing flash from metal figures or mold lines from plastic ones?

The real time savings comes with painting. Because there is zero detail on the figure – it is all shape – you can add or leave off as much detail as you like. Further, exact placement of details is not necessary and further gives your figures a more realistic look in that everyone is not perfectly uniform, in either detail nor pose.

One factor I did not mention, and is something I have been pondering, is 'block painting' versus 'figure painting' versus sub-assembly painting. What do I mean by those terms?

  • Block: all of the figures are assembled and then glued to the bases before being painted.
  • Figure: all of the figures are assembled, glued to painting strips (typically popsicle strips), and then each figure is painted before being glued to bases.
  • Sub-Assembly: the figures are partially assembled, painting each sub-assembly before assembling them into complete figures and gluing them to bases.

Why would you do any of these particular methods?

Block painting allows you to ignore painting details that can't be seen, i.e. if your paint brush cannot reach it, you generally can't see it either, so why paint it? This saves time, but sacrifices quality. (It also cannot be used if you are mounting the figures individually.) The surest way to make this method look good is to prime everything black so that the unpainted portions look like they are in shadow. The 2016 figures above were all block painted.

Sub-assembly painting is the other extreme. This allows you to easily paint everything producing the fewest mistakes (in terms of your loaded paint brush accidentally hitting an adjacent figure or part). It is very easy to paint details that you do want to appear. Hiding the glue spots after painting will be your hardest task. The figures I consider doing this with the most are the cavalry.

Finally figure painting is the happy compromise. You will still end up painting details that might not be easily seen, but will still have color in those hard to see, but still visible spots. Gluing will be covered with paint. All of the figures painted in the last month used this method.

I am curious what you do (or would do) and does it change with scale of the figure?

Sunday, February 2, 2020

Black Guard Dismounted Painting Tutorial

I am finally getting around to trying to make a step-by-step post about how I paint some of my wooden fellows.  I decided to do the dismounted Black Guard for my planned Conan convention game.  I finished assembling all of them (6) and decided to paint them, taking pictures along the way.

So, here we go ...
Here they are fully assembled without any paint.  I think the guy you have already seen (the test figure) is the one third in from the right side.  The rest are all new construction but I followed the same plan in terms of armor, helmet, etc. for all of them.

I use a number 0 or number 1 brush for everything on these figures except for priming, which is done with probably a #3 or #4 brush.

STEP ONE:  PRIMER & BOOTS
I usually prime my wooden figures with an Americana color called Soft Black, which is essentially a dark umber color.  But I wanted more contrast with these figures and to have their base be darker, so I primed them with black.  I used Americana black paint and a medium sized craft brush.  You can see the mounted guys in the back also primed.  Not painting them yet though.
I usually paint my figures from the ground up, and I started that way with these too, but I did change the order not that it really matters.  Here are the boots painted.  Although forewarning, I ended up not liking this color with the rest of the color scheme for the figures and painted them gray later on.  You'll see that in later pictures.  But for now, they were painted using Dark Brown from Delta Ceramcoat.  It is my favorite brown out there, but it ended up not being right for these figures.  I paint a basic toe with side and top covering and leave some black showing throw to create the illusion of seams and folds.  Don't get too fancy here, less is definitely more.  If it is too busy, the people looking at your figures will stare at the boots, which is not want you want.

STEP TWO:  EYES
One of the figures in the next picture also has his helmet and shoulder pads done as well, but that's just because I forgot to take a picture of them with their eyes done before starting the helmet and shoulder pads.
For the eyes I use Americana Warm White.  I do not paint the pupils.  I just paint white lines leaving a little space in between them to represent the pupil.  Figure out which way your guy is looking and for each eye paint a small dot or line in the direction he is looking for that side of the eye, and then a longer line for the other side.  This will give the illusion that the figure is looking in a particular direction.  For these figures, the leftmost figure and the figure fourth from the left is the easiest to see in terms of what I'm talking about.  The leftmost figure also has his helmet and shoulder pads done but I'll hold off on talking about that until the next step.

Here's a close up:


If I was painting flesh I would do it actually before I painted the eyes.  I just paint the entire face the flesh tone I am using for the figure and then after it dries I make two black lines for the eyes, then go back inside those lines and add the white dots/lines to finish them off.

STEP THREE:  HELMET & SHOULDER PADS
For these figures, the helmet in particular is the focal point, so I am going to put in a lot of painting details for both the helmet and the shoulder pads.
 I also added some teeth for a grimacing look to one of the figures as you can see.  Just more Americana Warm White.  Each helmet is similar but unique just to give each figure some personality and also because I hate painting exactly the same thing over and over again.  I used Americana Graphite and made sure to use lots of dots and small lines leaving plenty of black showing throw.  I wanted a "pebbled" look to the helmets so that it would look more like a snake head.  For the shoulder pads I did a stylized (more so than usual) snake head.  I added red eyes but not until the end, you won't see the red eyes in these photos until you get to the very end with the finished figures and even then I'm not sure you can see the red eyes in the pictures.  For the snake head shoulder pads I painted two "fangs" in the front (so that the snake's head is facing down the figure's arm) then small dots all around the outside of the rest of the shoulder pad piece.  Then I painted the eye sockets which was essentially a rounded letter "M" around and above the fangs.  Then I painted in a solid color behind the eye sockets all the way to the rear of the shoulder pad, but making sure to leave some unpainted black space between the solid piece I was painting and the dots surround the rim of the entire shoulder pad.

Here are some close ups:

STEP FOUR:  BELT
I usually do the belts next.  I decided I wanted them to be a black or very dark color instead of my usual choice of brown.  The belts are painted with Americana Midnight Blue and a space is left in the front for the buckle.  When I do paint the buckle in this case I went with Americana Zinc.  Also it is hard to keep the belt straight and clean, so I always just paint a line for the belt and then go back and touch it up with the primer color (in this case black) to give the belt a nice straight, narrow line.
Here is a close up of some of the figures where you can see the belt well.  You can really see the space I left unpainted so that I can come back and add the buckle later.

STEP FIVE:  PANTS
One of my favorite steps is painting the pants.  I used Americana Raw Umber for all of them.  Here is a shot of all of them.
It is hard to see, though, so here is a close up.
This is another time to not get too fancy or detailed.  I do a very basic and simple pattern here but it looks pretty good I think.  I paint the groin area almost like the figure is wearing a cod piece, and then paint the pant legs.  I make sure to leave black showing throw to represent the space between the legs, and also a thin line between the "cod piece" and the pant leg.  This creates an illusion of a fold and texture.  But if you paint too many of these lines for folds and such it looks too busy and is distracting in my opinion.

STEP SIX:  ARMOR
Armor is a tough step because there are so may ways you can go here.  I wanted to have these guys not wearing exactly the same thing, but I wanted them all in a black base colored armor.  So I did a mix of studded leather, ring mail, chain mail, padded/quilted coat, etc. to spice things up.
The figure on the left is wearing a padded coat.  I used Delta Ceramcoat dark gray color of some type, the name has worn off the label.  I just tried to paint diamond shapes in the gray color making sure to leave some thin black unpainted between the diamonds of the quilted armor tunic.  It is impossible to be perfect here, just do your best.  The goal is to give the impression of a quilted pattern, it doesn't have to be perfect.  The middle one is studded leather and I just painted on the studs using Americana Zinc as the first dot, and Americana Rain Gray for the "sharp" lighter dot on top of the Zinc dot.  I left the rest of the armor black except for the edges around the bottom.  There I put little dots of Americana Midnight Blue to represent lacing around the edge of the armor.  The far right figure has a new pattern for mail that I decided to try.  The paint color is Zinc again, and there is lacing around the edges of the armor and the neck.  For that I used Americana Russet (which is a REALLY hard color to find but it is perfect for dark leather).  For the Zinc, I just did a zig-zag pattern to create the illusion of small metal bands.  I had not tried this one before and I sort of like it, but it is a little busy.  I think next time I will try and space them out a little more.
The left and right most figure here are both wearing ring mail.  Again I put some edging around the neck and bottom of the armor using either Midnight Blue or Russet.  The rings are just that dark gray Delta Ceramcoat color I can't remember the name of.  To paint the rings, the paint needs to be thinned down with either a medium or water.  It has to flow easily or you will get rings that are not smooth.  As a general rule, smooth painting is very important in all areas for these figures mainly because you are painting on a flat surface.  You have no sculpting texture to "hide" you mistakes.  The figure in the middle is my usual mail pattern of small dots.  It also has an edging of Russet.

STEP SEVEN:  GLOVES OR HANDS
All my guys are wearing leather gloves, and because I like the color so much I stuck with the Americana Russet.
I paint three fingers first, either wrapping them around a spear or on the flat sides of the handle of the sword to give the illusion that the figure is holding the weapon.  I then paint a patch on the back of the handle of the weapon to represent the back of the hand.  Also, with the spear I add in some extra glue to provide and actual "bump" that represents the hand on the weapon.
You can see the hand on the sword on the right-most figure a little better here.

STEP EIGHT:  WEAPONS
Okay, by this point I wasn't liking the brown boots so I painted them black again and painted the boots again using the Delta Ceramcoat dark gray color that I can't remember the name of.  I also use it on the bladed parts of the weapons as a base gray color.  The shaft of the spear is Delta Ceramcoat Dark Brown.  The sharp parts of the blades on the weapons is Delta Ceramcoat Gray Rain.
You can see they are really starting to take shape now.  Just the shields are unpainted at this point.  When I make the swords I always cut an angled slice down the blade to try and create a sharp/narrow side of the blade for visual interest, then I try and follow this line with the Gray Rain paint to give the illusion of a sharp edge.
With the axe I always try and paint it so that the cutting edge is a single color but as the blade gets closer to the shaft I try and leave some space of the dark gray showing throw.  Gives visual interest and sort of matches the way some axe blades look because of their sharpening pattern.  You can also see that on the pommel of some of the swords I paint a golden/brass color just to give some visual interest.  You can't see it in these pictures but I also paint the part of the pommel of the sword that the figure's hand does not cover up at this point as well.  Just some lines to represent the wrapping of the handle of the sword, and be sure to leave some of the black undercoat showing through between the figure's hand and the wrapping of the handle.  Any color is fine, I like maroon, but this time I used a beige color.

STEP NINE:  SHIELD
Obviously the shield is going to vary depending on the figure, but I wanted all but one of these guys to have the same shield; a red one with the snakes facing each other over a moon painted in Warm White.  I don't have individual shots of the shields I just have the following shots of the finished figures, but you can see the shields.  They are painted Maroon from Delta Ceramcoat and then the snake/moon pattern is Americana Warm White.  On the inside I paint some stripes of Delta Ceramcoat Dark Brown to represent the wood, but it's barely visible on these figures.
The figure on the far right has a different shield.  I wanted some variety and decided to do a buckler guy.  I have a few of the small round precut discs that are smaller than when I can find now, but they are perfect for bucklers.
Shots from the rear.

You never know which will be your favorite.  This axe guy really grew on me and turned out to be one of my favorites.

Okay, that's it.  I hope you found this helpful.  I am pretty happy with how these turned out.

I'll probably paint the mounted version of these guys next, but that will be at least a week before I can get to them.  Work schedule is brutal right now.

Sunday, November 25, 2018

Craft Paints, Gesso, and Dark Age Colors

Interesting that Matt has been working on his Dark Ages forces recently as so have I. I have a huge backlog of audio books to listen to and computer gaming has gotten stale, so it is time to cycle to other interests, like picking up a paintbrush again. And my subject: finishing off my 42mm Anglo-Saxon force for Saga. No pictures yet, but you can find their enemies, the Anglo-Danes, in older posts.

Matt and I have talked about, through this blog and emails, about craft paints. Matt swears by them and I, well, swear at them. I hate the lack of covering power and don't really fancy painting figures several times to get the color I want. Painting larger figures exacerbates the issue as your are painting more surface area, increasing the time and expense. The two things craft paints bring to the table, however, are color range and cost. So it is hard to completely discount craft paints.

Gesso is a compound of plaster of Paris or whiting in glue, often used as surface preparation for wood. I have increasingly been using gesso on my wood projects as it reduces paint absorption in the wood, thereby reducing the amount of paint required to color the surface. When mixed with color, specifically craft paint, it reduces the number of coats required to get the color you want. With some colors, one coat of craft paint and gesso is all that is required.

The issue with gesso is that it is itself colored, either white or black. So mixing it with craft paint changes the color. No matter how much of the paint you put in, it will never go back to that color if it has gesso – white, black, or both – mixed with it. So mixing becomes an adventure in and of itself.

Working on my Anglo-Saxons, I wanted to try and use more 'realistic' colors for the cloth, so I found a page with some yarn dyed with materials available during the Dark Ages in Europe.


I was actually surprised by some of the colors. Basically, by mixing modern, vibrant colors with white, and sometimes a little black gesso, you can achieve some pretty nice colors for a Dark Ages palette.

So I decided to give it a try. Start with a little blob of white gesso, add some color that is more vibrant than a color similar to the above, then start mixing. Add another color, add some black gesso, and so on. One of the things it does is make the color slightly inconsistent, as maybe a stray bit of color is not as thoroughly mixed as the rest. This adds a nice, minor variation in the color, whether it is on one figure in a large surface area or it is between two figures.


In the end you tend to add a little color to the previous colors, getting more variations in color, and allowing you to paint several figures with like colors, but not exactly the same color. This makes the figures less uniform. Your palette also ends up looking very strange, with colors you used completely obscured.

I am not ready to declare complete success, but we will see after the paint dries on my Anglo-Saxons. I have the cloth parts done, but there is still a lot of work with the shields and the faces, so it may be some time before I get them done, especially as there are 24 infantry and 5 cavalry to do. I will be showing them later. But, I have come to wonder something else. How color-coordinated were they really back in the Dark Ages? Is it okay to combine colors that we would not combine today? Or are we, in the end, doing all of us for our eye?

Contributors

Followers

Blog Archive

Popular Posts

Labels I Use in Posts