Thursday, August 11, 2022

The Sarlacc Pit!

 Finished the sarlacc pit today so I thought I would post some pictures of it.  For the game, it is more of a "terrain piece" since it doesn't move or anything, but I treated it in my mind like a big figure so I would have more fun doing it.

A while ago I did some tentacles for the LotR games I was doing that were coming out of the water so I knew that I could use a similar construction approach with the tentacles of this beast as well.  They are beads hot glued together and then some white glue is put in the joints to increase strength.  After that, I used a hot glue gun again to smooth out some of the joints to make them look less like a beaded necklace and more like a tentacle, which essentially means that I covered up the white glue with more hot glue to make the transitions between the beads less severe.  It takes a lot of hot glue to do this, and some patience, but it's worth it in the end I think.

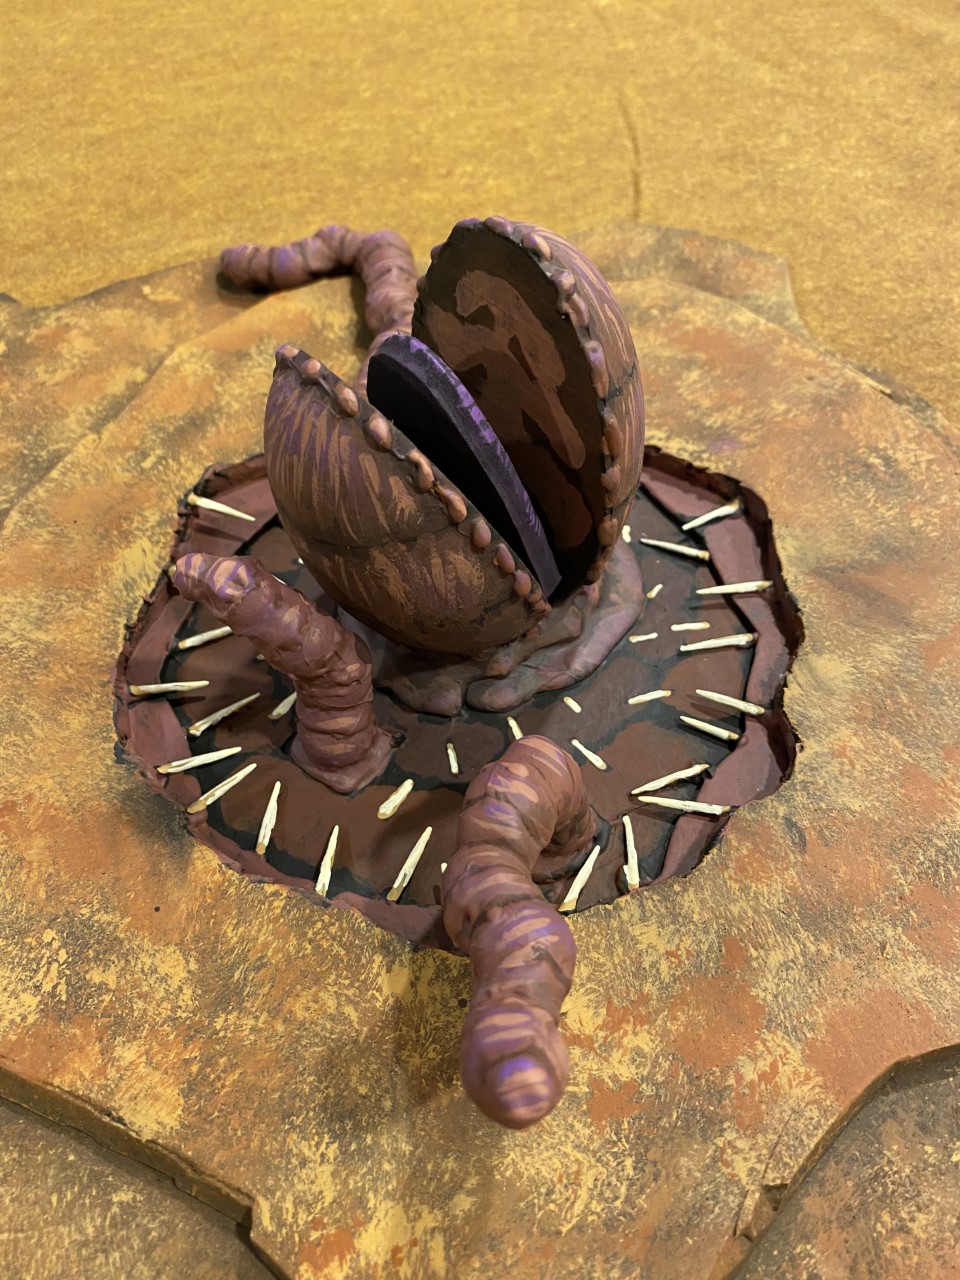
The head is made from two very large split eggs.  I used hot glue to make beads around its mouth just to give it some visual interest even though the "real" creature from the movies doesn't really have this.  Like the tentacles, the head is glued to a thin wooden pre-cut circle shape I bought at the craft store that I think is 6 inches in diameter.  I then took a large piece of the thin craft foam, cut it in an irregular shape much larger than the wooden circle, and cut an irregular center out of it that is smaller than the wooden circle and then glued that foam to the thin wood circle.  Then I took a smaller piece of the thick craft foam, cut it into an irregular circle shape that is larger than the wooden circle but smaller than the thin craft foam, and then cut the center out in an irregular circle as well but making sure it was a bigger circle than the interior of the thin craft foam.  My hope was that once the thick foam was glued onto the thin foam it would give a bit of 3D dimension and create a "hole" effect.  This seemed to work, especially when I then painted the center as if to appear that it is going down into the throat (?) of the creature.  On the top layer of thin foam closest to the center I added toothpicks with hot glue to give the impression of the spiky things on the inside of the creature's throat (?) and then painted smaller versions on the wooden circle closer to the center as the throat (?) descends into the depths.  The tongue is thick craft foam cut to shape and then I cut the part at the back of the mouth at a 45 degree angle to allow me to really squeeze the tongue down onto the base when gluing it so that it was snug up against the mouth pieces.

Here are some shots of it.

The base is painted with the stipple brush just like I did for the flight bases for the skiffs.  It's hard to see in this picture but the throat (?) of the creature is painted with a darker layer close to the neck of the head, then a lighter layer next to that, and then the lightest layer at the top which is the thin craft foam.  I was hoping that the darker to lighter color variation would create an illusion of depth.  I am not going to lie, it was really fun to build and paint this thing.

More pics.


You can see the toothpicks better here.  Can you tell which ones are painted on and which are actually 3D toothpicks?  Not easy, even in person.

Here is the pic from the movie that I used for inspiration.  How do you think I did?


 And finally a pic with the skiff so you can get a better sense of the scale.  Watch out Luke!  Be careful!

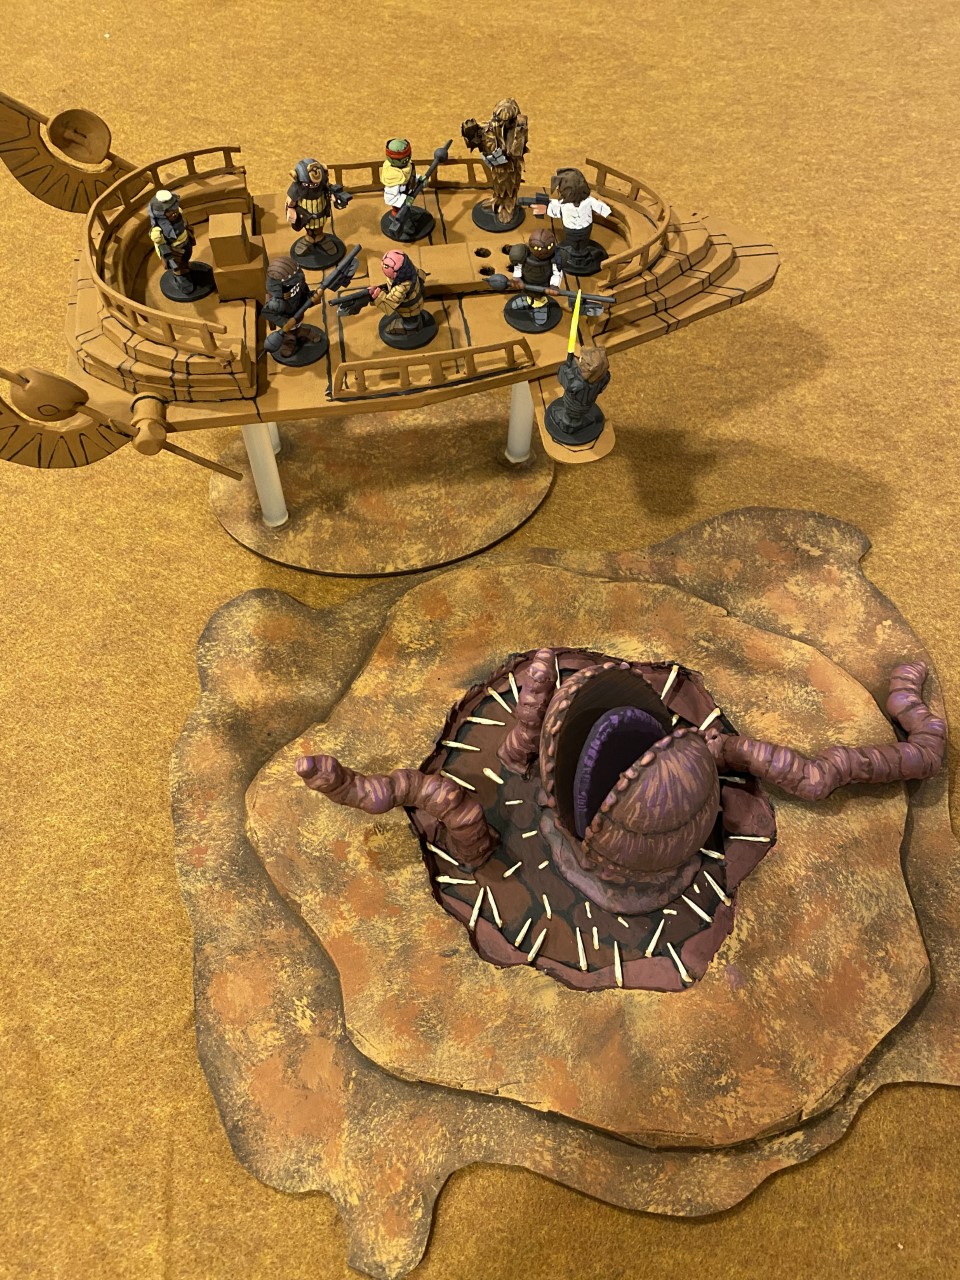
I am pretty happy with it, it is large enough to be intimidating on the tabletop, but small enough that transport will not be an issue.

All that's left now are the figures on Jabba's barge, including the droids, Princess Leia, and Boba Fett, and the barge itself which is going to be a nightmare.  But I'm still doing good on time, still more than a month to the convention.


Sunday, August 7, 2022

Vibro-axe Construction

 Dale was asking about the vibro-axes and he is right, I haven't done them before so I thought I would do a more detailed breakdown of their construction.  

They are quite easy, but they do highlight something that has been an important lesson for me to learn about making figures in this style.  The value of the tile spacers, not just because of their shape but also because of the flexibility and easy of cutting of the material they are made out of, cannot be overstated.  I just want to give a shout out to a guy named Neil who used to post way back a decade ago in the yahoo group who was actually the first to my knowledge to use tile spacers for arms.  I totally copied his idea with literally ALL of my figures since then, and have run with using them for as much as I possibly can.  Thank you Neil!

The vibro-axe is made from a toothpick, a tile spacer, and a bead.  The vibro-spear (the TMNT look-alike figure is carrying one of these) is the same material, just turned around (the handle is the tile spacer, whereas for the vibro-axe the blade is the tile spacer).  Princess Leia is going to be wielding a vibro-axe in my figures so I have it done but not yet painted.  So I took a picture of it so you can see it clearly.

That is a small oval bead glued to the left end of the toothpick, the sharp point of the other end of the toothpick was removed, and a tile spacer is cut to match the shape of the "business end" of the vibro-axe.  It's sort of hard to see but the tile spacer as you all know starts as a + shape, I just cut away material I didn't need to produce this shape.  Also, the bladed part is cut at a 45 degree angle to make it thinner.  That's hard to see in the picture.  The tile spacer is then just glued onto the toothpick and that's it, good to go!

Back to painting the sarlacc pit!


Wednesday, August 3, 2022

Barrage 2022: Part II: Skiff #1 with Heroes

 I almost had the second skiff painted when I made the first posting about this game, so all I had to do really was paint the figures.  This is the skiff that has some henchman as well as the heroes minus Leia and the droids on it.  

This skiff is exactly like the first one EXCEPT that I added a thin piece of foam on the bottom in the shape of a staple that once glued to the bottom side of the skiff allows me to slide the "plank" in and have it extend off the side of the skiff.  Since I'm not really sure how I'm going to start the game (Luke on the plank or already off the plank?) I needed to have the plank on the skiff regardless of where Luke starts the game, so I knew I was going to have to figure out a way to mount it.  However, I didn't want it to be permanently attached just so that I can have more flexibility with the skiffs and, like the tail fins, if I mounted the plank permanent I'm sure it would break off during transit.  As is usual when I do something a second or third time, I think I did a better job painting this second skiff than the first having had one "under my belt" already and I could avoid some of the mistakes I made.


I took some close ups of the figures this time as well, so I will talk about them later with their pictures.  But as you can see, this skiff has a plank for Luke.  Again, it's removable.  In all other ways, this is identical to the other skiff.  I used the same templates to cut the pieces of both of the skiffs so they share the same dimensions.  If you are interested, they are about 11.5" long and 5" wide at their widest point.


I really like how the figures came out.  Here are some heroes.


Han and Chewie obviously.  Both came out better than I thought they would.  I was able to pitch Han forward a bit so he is "leaning into" his shot.  His shirt has a flap on the front that is opened and I just constructed the flap with paper.  In all other ways he's standard milk bottle figure construction including the big bangs that I like to put on my figures, and in this case they are appropriate for Captain Solo.  Chewie was tough at first, how to make him tall without being too tall, and he had to be relatively thin.  He's a milk bottle with a barrel bead sideways glued on top, then with the standard tile spacer arms and bead head.  I added a smaller bead for his mouth given his head is sort of gorilla shaped.  The paper was tough for him but once I got started doing it in layers it worked out fine.  Very easy to paint as well.  His belt is just cut tile spacer material glued onto the body and painted to match his standard equipment.

Now we have Lando and Luke.  They are both standard milk bottle figure construction.  Lando was tricky though because I had to paint the fact before adding the mask, and that was very, very tricky.  I love his look, though, just like in the movie I think he has one of the best armor configurations in the movie.  Luke was not too tough, I had done a figure for an rpg that was holding a sword extended like this, so I knew how to get the effect.  You trim the inside of the tile spacer arm, not the outside, so that you can create a "bend" effect and have the hands meet together in front of the figure.  The lightsaber is obviously a toothpick painted with florescent paint.I had to give him a "tunic" top which has small shoulder pads and flaps that extend down below his belt. I just did it with paper.  Same for the high color of the jacket.  

Now onto some bad guys ...


These guys are not my favorite henchmen, I like the guys on the other skiff better, but I do like the guy in the middle.  He's got it out for Luke because Luke killed this guy's pet rancor.  All three of these guys are standard milk bottle figure construction, nothing new really.


Melee guy and the pilot/blaster wielding guy.  They both turned out good, but nothing new construction wise.


Both skiffs together.  Now onto the sarlacc in its pit!


Contributors

Followers

Blog Archive

Popular Posts

Labels I Use in Posts