
A typical starter force for Saga is six points – with one point being either a unit of 4 Hearthguard, 8 Warriors, or 12 Levy – so about 45 figures including the Warlord. A typical starter force for Lion Rampant is 24 points – with a six point unit of Men-at-Arms (Knights) being 6 figures, a four point unit of Sergeants being 6 figures if mounted and 12 figures if on foot, and a three point unit of Yeomen being 12 figures – so about 66 figures.
So I decided to aim for units of 6 for the Men-at-Arms and 12 for everything else and this would allow me to use the units for either set of rules.
I wanted to start with the Knights (of course), and of them, the Warlord (Saga)/Leader of the Men-at-Arms unit (Lion Rampant). As I work through the unit I will show you the variations that I make of the figure, but this particular model, being the leader of your forces, had to be different than all the rest.

The horse is standard – three split eggs (front legs, back legs, and head), a large spool (body), and a small spool (neck) – and I have added foam pieces cut out with jagged-edge craft scissors to make the mane and tail. (You can see the scissor I am referring to in this article about experimenting with foam sheets.)

The figure is the typical "boy" pawn that I use, which is 1 5/8" tall. I completely cut off the "head" and replaced it will the top half of a spool. I also cut off a length at the bottom that represents the legs as I attached wooden "legs" to the side of the horse.
The lance/spear is a simple dowel – either 1/8" or 1/16", I forget – and I used a pencil sharpener to get the initial point following it up with a Dremel sander to make it a proper spear head. I may add a vamplate above the hand later. (I need to research when they came into common use.)

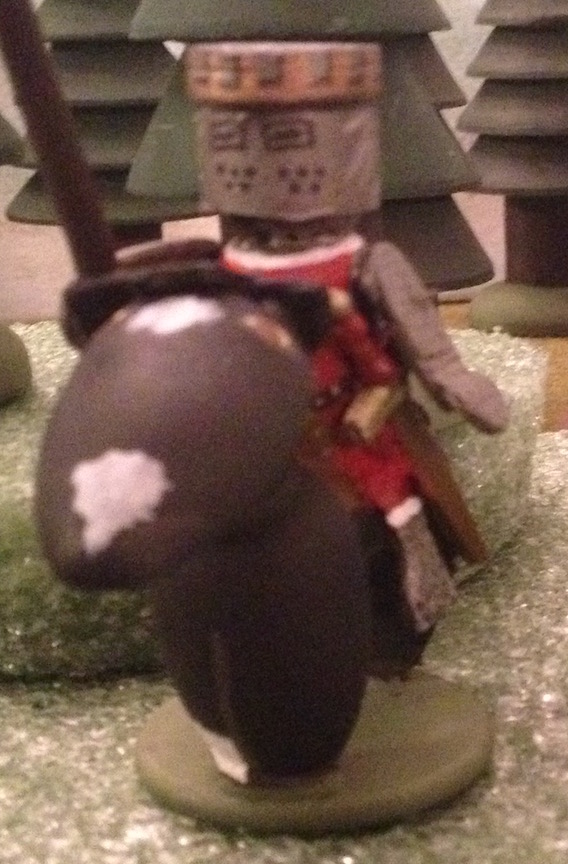
This view shows the horse's arse a little better, and the tail I cut out of foam. You can also see a bit of detail I put on the saddle. I simply painted a brown leather rectangle on the figure's back and then added studs using a silver Sharpie. (I love the metallic Sharpies. I used them on the crown too and face too.)

I thought about using small wood rectangles to make the armor plates that protect the eye slits, but felt that given the small size it would be too fiddly. I simply used a fine, black Sharpie to define the plates, slits, and air holes in the helmet.

Here is a shot comparing the Knight to an old, very chunky, Citadel 28mm soldier. (I think he was from Heroquest.)
Tom Foss from Wooden Wars (Skull and Crown) was kind enough to send me one of his wooden figures that he cuts and engraves with his laser cutter. (Where is that "envious" emoticon?) and one of the things I was intrigued by was his use of layering wooden parts. I will go into more depth on the subject (probably after I come back from my business trip), but I wanted to show you a small experiment.

Essentially what I did – shown in the pictures of the left hand, above and below – is glue a small wooden piece on a shortened wooden arm. That allows me to add just a touch of dimensionality to the hand. (Note that I sanded a bevel where the two pieces met in order to make it look a little better. What can I say? I am a sander.)
Unfortunately (for my hobby), I will be going on a business trip for two weeks starting on Oct 17. So I will not be posting any articles until after I return. (The hotels complain when you get wood dust all over from sanding and get hot glue on the desk.) Matt will carry on for the both of us while I am gone. I may be able to finish my Sergeant-at-Arms before I go, but I am not making any promises. But if I do, I will be sure and post it before heading out.
A Blast from the Past
In an email to Matt (the blog's co-author) I was reminiscing about how it all started for me: making my own medieval miniatures as a kid. All I had was index cards, a LOT of beads of various sizes, white glue, scissors, pliers, and some old plastic sprue. From that I made Knights. They were my first miniature figures because that was all I could afford. (Sadly, I cast them all aside when I could finally afford Airfix figures.)I decided to try my hand at making some of my old "Bead Knights".

I modified the design a little. I used a round toothpick for a lance (I have no idea why I did not think of that back then) and the end of a flat toothpick for the shield (I used index cards back then).

With the hot glue I can fill the gaps just as I did back in the day, but now it hardens much faster. No attempts to make arms or legs here; that will all be done in paint.

Here is a comparison shot with that old Citadel 28mm foot soldier. In terms of body mass, they are closer to 20mm or 25mm figures, but from "foot to eye" they are more like 12mm.
The more I look at them, the more I think this might be a really nice way to build a mass army. Very simple construction. Very fast to paint (because you really can't put too much detail in). I just might make an army of these, for nostalgia's sake.
Funny story (at least to me). When I showed my "Bead Knights" to other people – who happen to have large figure collections, much of it well painted – I always received a polite smile, but nothing else much. No one wanted to use them, of course, because they were "out of scale" with everyone else's troops. One day I read the article in Miniature Wargaming about Andy Callan's "Hair Roller Armies" and I remember remarking "why would anyone want to game with armies made from hair rollers?" One of the guys who always smiled politely when I was gushing about my Bead Knights snapped "why would anyone want to game with Knights made from wooden beads?" That was my first indication that not everyone else thought this was a cool idea.But you know what? I still love the look of these little guys. Especially when you paint them up.


(Sorry the first picture is fuzzy. He was riding by too quickly.)
I wanted to recreate the Bead Knights of Yore as they were then. I had a limited selection of beads, so I used what I had. If I did it today, the crafter in me says that I would use a cone-shaped bead for the horses head and include a small bead to act as the horse's neck! I tell you, there is something enticing about the figure. I could see using figures like this for grinding out a mass ancients or medieval army because the scale forces you to paint only the most obvious items and leave the rest to the imagination.
One Last Thing
Way back when I showed the prototype of a Polish Winged Hussar. Well I ran across the unfinished figure and worked a little more on him.


You can see that the figure, in comparison to the 28mm figure, is just as chunky, but a little shorter. (It is harder to tell as one is mounted and one is not.) Construction is relatively simple, but tedious to work on. The figure is, from top to bottom, a mushroom plug (or button plug), a rounded top plug, and a spool. The tedious part is that the spool had a large about of wood removed in order for the rider to straddle the horse's body. Unlike with my Knight, the body and legs are all one piece.
Let me tell you right now that I make a lot of prototype figures, just for fun, never intending to make multiples of the figure. I just want to see if I can make something. This is one of those figures. Not only because it is a complex figure and it would take a long time to get a decent number of figures built for a single unit, but also because I would have no other figures that would go with it (especially at that scale). Finally, and probably the biggest reason: I have a large number of painted, 15mm Polish Winged Hussars already, and they go unused.
I will definitely finish the figure and paint it up though.
As always, I love your stuff! The larger scale with the wooden construction gives a heartiness to the figures that is very appealing. I'm especially impressed with the helmet of the knight, I know how much goes into starting with the pawn and ending up with the piece that you end up with.
ReplyDeleteAs for the bead guys, those are great! I've been thinking about how to make a 6mm/10mm/15mm scale equivalent figure that is easy to produce and looks great. I really like the bead guy a lot. Looks like it would end up being about 20mm or so? I know that beads come in different sizes so it may not be that tough to make 15mm or maybe even 10mm guys. The real beauty of these seems to me to be rapid construction and ease of construction, and the flat surfaces allow you to focus on what you want to paint for each figure and putting the signature detail there rather than worrying about all the little fiddly stuff on the smaller figures that no one sees on the gaming table even with highly detailed metal sculpts. You can see them when you hold them up 6 inches from your face, but on the table? All you really see is what you painted on your guy, which is the helmet, the covering for the horse, and the weapon/shield. The point of these wooden warriors in my view has always been less about making an equivalent wooden figure in detail compared to a metal sculpt, but instead to create a quicker to paint, lighter to carry figure that on the table in a gaming situation allows the person playing from 3+ feet away to say "those are knights" or "those are American WWII GIs" or "those are Macedonian skirmishers" or whatever.
I must now resist investigating bead armies, and after seeing your knight, that's going to be tough for me to do.
I hear you on that last part. It was pretty quick and easy to construct. I found myself going through a bead catalog looking for a cone bead that would serve as a better horse's head (and I found it). :)
DeleteI could see making a Dark Ages army for, say, Dux Bellorum. A shield wall of bead warriors! :D
Loving the horse! Brilliant.
ReplyDeleteH