I happened upon an interesting combination of shapes today, and it occurred when I was thinking about finishing my 25mm DBA Roman army. I had started my Romans using a Micro Shaker Peg, which is the same basic figure that I used for my 25mm DBA Armenian army. How I was doing the helmet was taking a lot of sanding, which generally does not bother me except that the 25mm figures are much smaller than the 42mm ones, so I end up sanding my fingertips.
The figures below show the basic pieces used to make the figure. Starting from the top you have a small (mushroom) button plug. This part gives a 'head with helmet' look that is 'almost there'. It is attached to a round head plug, which gives a nice impression of shoulders, and combined with the top of the spool, defines the figure's abdomen. The spool at the bottom gives the legs and feet. Using the same spool, I carefully split it in half, making a nice rounded Roman scutum, something I have been pondering on how to simulate for awhile now. I sanded the inside a little in order for it to fit the curve of the figure and give a nice surface area for gluing. Finally the right arm is the rounded end of a flat toothpick while the gladius is the pointed end of that same toothpick. (For a pilum I would use a rounded toothpick.)
It would be very easy to glue those pieces together and just go with that, but you know me. I like the little details. The half spool makes a great scutum, but only the top and bottom shield rim is represented, so I took two pieces of thin foam sheet and made the rim for the left and right. Trimming it with a sharp blade will make it look better.
To finish off the helmet, I added a strip of thicker foam sheet and glued it to the sides and back of the 'head' under the 'helmet'. Using a sharp blade I cut out the section where the ears were exposed. Simple, but effective. As I look at other pictures of Romans I may find other bits and pieces to add, but for now that looks pretty good. I can make these much faster than the ones I had been making previously. Given that these will be a little thicker, I think I will use these for the legionnaires and the others, based on the micro shaker pegs, the auxilia.
Now the only question is: do I paint these myself or send them to Bob? I think they would do well with the marker pen treatment that I used for my Armenians.
Sunday, February 5, 2012
Mass Production Methods
First, I would like to welcome new reader ZeroTwentyThree to the blog. I hope you enjoy it.
It has been awhile since I wrote on this blog and that has been because I take on too many projects simultaneously. I don't know why I do it, but there you are.
I made some Prussian Napoleonic Landwehr and sent them off to Bob Barnetson to be painted. You can find the results on his blog. I've finally gotten them in an am happy to report that they look as good in person as they do in the pictures. I am currently building a batch for Bob right now and that has prompted this short blog entry.
One of the lessons of making my wooden soldiers is that much of the time spent is in switching between tool bits - the various sanders, grinders, and drills. Because it takes so much time (and puts wear on the tool) it makes sense to minimize that as much as possible, which means doing quite a number of similar bits and pieces before moving on to another.
For example, I have to use a jig to make my shakos and it takes a few minutes to use it properly, so it makes sense not to make only one shako, even if that is all I need. So now I typically grab as dozen spools or so and make them into shako, storing the excess in zip lock storage bags until I need them.
Another technique is build several different types of units, or units in different stages of construction, at the same time. Often you find yourself gluing two components together and then needing to sand one of the components just glued. Rather than weakening the bond from sanding it too soon, it is better to switch to another task, either making new components or working on ones that have dried thoroughly. This usually means having several different projects to work on at the same time.
Right now I am working on a Napoleonic infantry unit (I have not decided on which specific one yet, which is the beauty of these figures; most of the detail is in the painting) and two small cavalry units. When they ar built, I will take pictures and then send them off to Bob for painting.
I still need to finish my 25mm Romans DBA army and I have to figure out a better way to make artillery. Plus I have to make it a little smaller if I want to have any hope of using it on anything other than a humongous table.
It has been awhile since I wrote on this blog and that has been because I take on too many projects simultaneously. I don't know why I do it, but there you are.
I made some Prussian Napoleonic Landwehr and sent them off to Bob Barnetson to be painted. You can find the results on his blog. I've finally gotten them in an am happy to report that they look as good in person as they do in the pictures. I am currently building a batch for Bob right now and that has prompted this short blog entry.
One of the lessons of making my wooden soldiers is that much of the time spent is in switching between tool bits - the various sanders, grinders, and drills. Because it takes so much time (and puts wear on the tool) it makes sense to minimize that as much as possible, which means doing quite a number of similar bits and pieces before moving on to another.
For example, I have to use a jig to make my shakos and it takes a few minutes to use it properly, so it makes sense not to make only one shako, even if that is all I need. So now I typically grab as dozen spools or so and make them into shako, storing the excess in zip lock storage bags until I need them.
Another technique is build several different types of units, or units in different stages of construction, at the same time. Often you find yourself gluing two components together and then needing to sand one of the components just glued. Rather than weakening the bond from sanding it too soon, it is better to switch to another task, either making new components or working on ones that have dried thoroughly. This usually means having several different projects to work on at the same time.
Right now I am working on a Napoleonic infantry unit (I have not decided on which specific one yet, which is the beauty of these figures; most of the detail is in the painting) and two small cavalry units. When they ar built, I will take pictures and then send them off to Bob for painting.
I still need to finish my 25mm Romans DBA army and I have to figure out a better way to make artillery. Plus I have to make it a little smaller if I want to have any hope of using it on anything other than a humongous table.
Wednesday, December 21, 2011
A Simple Change
One of the things I have been pondering is a better looking musket, while still having it pretty simple to make. Previously, I took a flat toothpick and simply cut the rounded end off, then painted the pointed end as the bayonet. Very simple and it give a good effect, but very 2D.
I started looking at the round toothpicks used by others for their figures' spears and decided to give it a try to represent the bayonet. So, I clipped off the rounded end and the pointed end to make the musket, then glued the pointed end of a round toothpick to the smaller end of the flat toothpick. It now gives a nice effect of a musket with the bayonet properly offset to the side, with little extra effort.
All that remains is to see if it stays glued to the figure...
By the way, this is the finished Napoleonic Prussian Landwehr infantryman. I am sending him off to my painter in Edmonton, Bob Barnetson, as a sample for the rest of the figures to be painted (a total of 12 men in defending pose and two skirmishers in firing pose). This will be the first time someone else will have painted figures of my own creation, so I am looking forward to feedback from Bob on whether he finds this (freehand) style harder or easier, wood harder or easier than metal or plastic, etc. That and if he likes painting the figures, it will allow me to focus on making the figures while he paints them. So I may one day get to my "dream game" of hundreds of 42mm wooden toy soldiers on the table in a small Napoleonics battle.
I started looking at the round toothpicks used by others for their figures' spears and decided to give it a try to represent the bayonet. So, I clipped off the rounded end and the pointed end to make the musket, then glued the pointed end of a round toothpick to the smaller end of the flat toothpick. It now gives a nice effect of a musket with the bayonet properly offset to the side, with little extra effort.
All that remains is to see if it stays glued to the figure...
By the way, this is the finished Napoleonic Prussian Landwehr infantryman. I am sending him off to my painter in Edmonton, Bob Barnetson, as a sample for the rest of the figures to be painted (a total of 12 men in defending pose and two skirmishers in firing pose). This will be the first time someone else will have painted figures of my own creation, so I am looking forward to feedback from Bob on whether he finds this (freehand) style harder or easier, wood harder or easier than metal or plastic, etc. That and if he likes painting the figures, it will allow me to focus on making the figures while he paints them. So I may one day get to my "dream game" of hundreds of 42mm wooden toy soldiers on the table in a small Napoleonics battle.
Wednesday, November 30, 2011
Painting with Oils
Before I start a quick hello to a new reader Joppy, who is soon to retire in January 2012. I hope you'll be making some wooden warriors of your own during retirement, and willing to discuss them here. Welcome.
Today's entry is a guest blog entry of a sort. It was actually a post on the Wargaming on a Budget forum on Yahoo and reader and internet buddy Jim Walton thought it was so good that he thought it should be preserved. So here are the collection of posts from Otto, a.k.a. nemopholist.
To put in context, Matt Kirkhart started by showing new pictures of his 28mm Romans he is building for a new project. Eric asked some questions about paints, painting, and other hobby tricks, to which Matt responded. At some point I added a few remarks about the paint I use (and don't use), plus a particular problem I had "solved" of late of getting a nice, strong yellow on top of a dark blue. At that point Otto spoke up:
When Jim asked Otto about acrylics, his response was:
Today's entry is a guest blog entry of a sort. It was actually a post on the Wargaming on a Budget forum on Yahoo and reader and internet buddy Jim Walton thought it was so good that he thought it should be preserved. So here are the collection of posts from Otto, a.k.a. nemopholist.
To put in context, Matt Kirkhart started by showing new pictures of his 28mm Romans he is building for a new project. Eric asked some questions about paints, painting, and other hobby tricks, to which Matt responded. At some point I added a few remarks about the paint I use (and don't use), plus a particular problem I had "solved" of late of getting a nice, strong yellow on top of a dark blue. At that point Otto spoke up:
Dear Dale,
Use tube oils like I do. They are much better to work with, much better coverage, more durable, and for what you get-- very cheap. True, some of the more oddball shades can cost $15 a tube, but you'll have it forever. I don't think I've gone through one tube (except black and withe) in the 30 years and thousands of minis I've painted.
Takes a week or two to dry though.
However, I have 7years War troops I painted 35 years ago and they are as vibrant and bright as they were when new, and much less chipped or worn.
OttoNow, I actually have a little experience with oils, and it wasn't good, mostly because I cannot tolerate the smells of the various oils and chemicals that go along with it. It also did not help that at the time I lived in Florida (USA), which is a high humidity environment, which is not very conducive to fast drying times with oils!
When Jim asked Otto about acrylics, his response was:
Don't like Acrylics.
They dont have a tenth of the durability of oils, and they react with the lead and oils of the paint and your hands to get shabby and drab.
Oils will also form a moderately good barrier against oxidation, which acrylics will not.Jim then asked the questions:
Do you have a measured way of thinning them before use and what do you use, turpentine? I say "measured" meaning that you can pretty much depend on a particular amount working for most colors, or do you do it "by eye"? Can you store them once you've mixed them?To which the reply came:
Dear Jim
Yes to all. Now having said that let me talk out of the other side of my mouth.
Grumbacher oils (though you can use any company, they are pretty much the same) can be thinned with a variety of media- paint thinner, mineral spirits (not always the same thing) or linseed oil. Each chemical does certain things to the paint and can achieve a certain effect. Linseed oil for example radically exponentiates the drying time but it provides the hardest and most durable product I've ever seen. It sets almost, (in my experience) to a hard glass-like finish. Turpentine will be easier to work with and allow faster drying and it will also "matte down" the surface. Mineral spirits and paint thinner the same, but be careful, some paint thinners are really paint cleaner and pretty much wreck the paint.
I have pre-mixed and pre-measured oil paints and they store quite well provided you have small plastic vials to do so. Make sure they are air-tight. You can store them mixed with any of the media above though you may have to stir them up after long use as the thinning agents tend to pool at the top.
What I mostly do is take several thickness of ordinary newspaper, especially from the advertisement sections where they have a lot of paper without ink on it. and use that. I squirt out a teensy bit of paint (you will be surprised how much a little goes a long way) and then thin it on the paper pad with the thinner (whatever you wish). The paper absorbs some of the oil and "mattes it down." Alternatively you can use old bottle caps from soda, iced tea, milk, fruit juice bottles, or jars which make excellent paint trays. Toss some newsprint in there and you have an impermeable base to keep the thinner off your wife's dining room table or the like. (Better yet, do it on an old scrap piece of wood in the cellar.)
I use a general color wheel to get the shade, tint, and tone I want and then mix as I go along. If I am running out, I simply squirt a little more on the paper and mix more till I get the same homogenous tone. The key is a good eye in estimating how much paint you will need to cover a batch of figures. When I first started out, being used to bottled paints, I mixed huge batches. Now I tend to radically under-mix. When I'm finished with a painting session I leave the slip of newspaper with the last color on it as a sample in a small box for future matching.
The MOST essential part of this whole thing I have found is not the paint, not the brushes, not the thinner, but the process. What I do is get the empty boxes of computer paper from work, that is boxes from whom the computer forms were offloaded to a printer and box discarded. What I do is take the box and lid home and put the BOTTOM of the box in the upside down lid, mark the box, and then cut away the excess above the line, leaving a tray which fits inside the lid. This forms a "drying box" which I can use to place one project, close the lid and go on to another project, doing the same and letting the boxes stack up. Thus I can have a dozen units going at once and simply rotate through them doing more when I get to it. Thus with about 8 boxes I can keep continuously working on something.
Another way to store the paint papers with a worthwhile smidgen of paint on them is simple zip-lock sandwich bags with the lid of a small gift box or pill box overturned on top of the pile of paint.
It's not for everyone, but I like the fact that since I mix my own colors I can vary the intensity from a brilliant vibrant color to a washed out pale.
OttoWell there you have it, preserved for all time. I hope you find it useful, as Jim did.
Monday, November 14, 2011
More Experiments with Foam Sheet
This is the first time I have done it, and I really should have done it every time someone new joined the blog, but I would like to welcome the new readers Captain Richard's Miniature Civil War, Schrumpfkopf, and Danjou's Hand. I hope you enjoy the material.
Using Foam for Arms, Feet, and Spiky Bits
So, I told you in a previous blog entry that I was going to experiment more with craft foam sheet for those parts that need more flexibility, or that are just a bit too hard to produce in wood. In this first example, I want to reproduce the classic 'defending' pose, as shown in the figure below.
In order to make arms for this pose, the material for the arms and hands really have to be flexible, hence experimenting with foam sheet. As you can see in the figure below, using a wooden template I cut a 'bent arm' shape from purple foam, glued it to the sides, glued the hands to the musket, and have a perfect shape. (The right hand has some modelling paste on it where I had to fill in cutting out too much foam.)
One of my concerns about using foam sheet is that it will not be solid enough to withstand handling. Only time will tell, but my thoughts were to try to saturate the foam with various liquids to both give it more strength and to provide a better painting surface. Previous tests with standard white glue were not satisfactory as the water-based paint dissolved the glue to some degree. Using Gorilla Glue Super Glue was a thought, but it is expensive and the foam absorbs a lot of liquid. In this last test I used Liquitex Matte Medium and the thickness seemed to clog the pores and create a even surface. Although I would not say the foam is significantly stronger, it is more rigid.
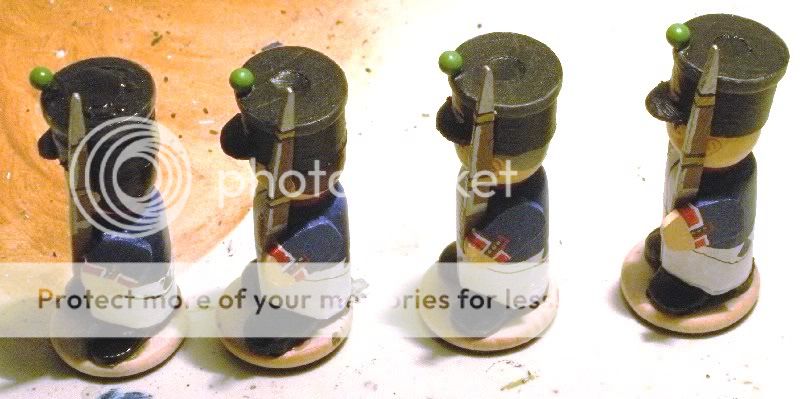
So here is the Prussian Napoleonic Landwehr private painted up. Although the top of the hat should be larger – a flat head plug of the appropriate size would be better than a 1/3 spool – I am not going to complain with the results.
You can see how I used a lot of foam for this troglodyte archer (still needs his bow). Although the hands look misshapen and out of scale, you can easily cut it back once you fold the material, glue it in place, and see what needs to show and what can go.
Making Templates
The easiest way to get a little consistency in you foam parts is to make a template. I created my in a computer drawing program, printed it to paper, used that paper to transfer to wood, then cut the wooden part out. You want a wood (or metal) template so that when you cut around it with scissors, you cannot damage the template itself.
Here you can see my template for the bent arm. I usually cut a little excess at the flat end to make the hand, leaving more material if I need a longer hand to grip something. Once I've fashioned the wood piece I can simply press it hard into the foam sheet and cut out the indentation, as (barely) shown in the figure below right.
The troglodyte arm and hand was fashioned in the same way, using an old wooden base for the template material. I hand-drew the arm and hand (should have used the computer) and whittled the foam down to a manageable size from there.
Again, getting the basic shape is the most important thing, not getting the perfect shape. (Although that's nice too.)
For my spiky bits (troglodyte crests and spines) I found some craft scissors in the scrapbooking section of Michael's and found some that produced a nice jagged edge cut. Those make creating strips of spiky bits very easy!
The good thing about craft foam sheet is that they come in a variety of thicknesses and colors.
Using Foam for Arms, Feet, and Spiky Bits
So, I told you in a previous blog entry that I was going to experiment more with craft foam sheet for those parts that need more flexibility, or that are just a bit too hard to produce in wood. In this first example, I want to reproduce the classic 'defending' pose, as shown in the figure below.
In order to make arms for this pose, the material for the arms and hands really have to be flexible, hence experimenting with foam sheet. As you can see in the figure below, using a wooden template I cut a 'bent arm' shape from purple foam, glued it to the sides, glued the hands to the musket, and have a perfect shape. (The right hand has some modelling paste on it where I had to fill in cutting out too much foam.)
One of my concerns about using foam sheet is that it will not be solid enough to withstand handling. Only time will tell, but my thoughts were to try to saturate the foam with various liquids to both give it more strength and to provide a better painting surface. Previous tests with standard white glue were not satisfactory as the water-based paint dissolved the glue to some degree. Using Gorilla Glue Super Glue was a thought, but it is expensive and the foam absorbs a lot of liquid. In this last test I used Liquitex Matte Medium and the thickness seemed to clog the pores and create a even surface. Although I would not say the foam is significantly stronger, it is more rigid.
So here is the Prussian Napoleonic Landwehr private painted up. Although the top of the hat should be larger – a flat head plug of the appropriate size would be better than a 1/3 spool – I am not going to complain with the results.
You can see how I used a lot of foam for this troglodyte archer (still needs his bow). Although the hands look misshapen and out of scale, you can easily cut it back once you fold the material, glue it in place, and see what needs to show and what can go.
Making Templates
The easiest way to get a little consistency in you foam parts is to make a template. I created my in a computer drawing program, printed it to paper, used that paper to transfer to wood, then cut the wooden part out. You want a wood (or metal) template so that when you cut around it with scissors, you cannot damage the template itself.
Here you can see my template for the bent arm. I usually cut a little excess at the flat end to make the hand, leaving more material if I need a longer hand to grip something. Once I've fashioned the wood piece I can simply press it hard into the foam sheet and cut out the indentation, as (barely) shown in the figure below right.
The troglodyte arm and hand was fashioned in the same way, using an old wooden base for the template material. I hand-drew the arm and hand (should have used the computer) and whittled the foam down to a manageable size from there.
Again, getting the basic shape is the most important thing, not getting the perfect shape. (Although that's nice too.)
For my spiky bits (troglodyte crests and spines) I found some craft scissors in the scrapbooking section of Michael's and found some that produced a nice jagged edge cut. Those make creating strips of spiky bits very easy!
The good thing about craft foam sheet is that they come in a variety of thicknesses and colors.
Saturday, November 5, 2011
Typhoon Tungsten Carbide Burr
In the past I have purchased several structured tooth tungsten carbide cutters from Dremel (the taper and the cylinder) to rough carve wood, but I haven't been overawed with how much faster it can remove stock than a regular coarse sanding drum. So it was with some hesitancy that I ordered a Typhoon Tungsten Carbide Burr (Coarse) from Micro-Mark.
As the package says: for aggressive material removal. Now we are talking! It looks kind of funny and as you can see in the picture, it already has wood dust in it, because I had to try it out on my toughest problem: hollowing out the interior of a 1/2 spool in order to use it as a hat.
As you can see from the pictures above and below, it made a nice little bowl that fit perfectly on my game piece figures' head. And it did it very quickly and easily. No bucking of the tool at all. The burr bit into the wood and tore through it with no problem.
Highly recommended! I've gotten the coarse ball and cone shapes, now to get the rest. I also purchased some small chisels, so maybe I will do something with that soon and can have an article on that.
I wanted to order a bending brake in order to make metal movement trays, so looks like I will be putting in another order to Micro-Mark soon, which is a really great place to get small tools for working with miniatures.
As the package says: for aggressive material removal. Now we are talking! It looks kind of funny and as you can see in the picture, it already has wood dust in it, because I had to try it out on my toughest problem: hollowing out the interior of a 1/2 spool in order to use it as a hat.
As you can see from the pictures above and below, it made a nice little bowl that fit perfectly on my game piece figures' head. And it did it very quickly and easily. No bucking of the tool at all. The burr bit into the wood and tore through it with no problem.
Highly recommended! I've gotten the coarse ball and cone shapes, now to get the rest. I also purchased some small chisels, so maybe I will do something with that soon and can have an article on that.
I wanted to order a bending brake in order to make metal movement trays, so looks like I will be putting in another order to Micro-Mark soon, which is a really great place to get small tools for working with miniatures.
Wednesday, November 2, 2011
Experimenting with Foam Sheet
One aspect that I am not satisfied with of the soldiers that I build is the stiffness of the arms. Part of that is the material I use (wood) and part of it is the source (a craft stick). If I used a wider craft stick, for example, I could cut a bent arm shape out and get more variation to the arm, but that makes each arm custom crafted, adding to the time to make a figure. Fine for one-off figures, but slower if trying to build a force.
It was while looking at Kenneth Van Pelt's Zulu-era soldiers on his Penny Whistle blog, that I noticed and liked the bends and poses of his pipe cleaner arms, but in the end did not like the "fuzzy" look. I started looking about for other materials to make the arms with that would give me that flexibility, yet give me more of the flat, craft stick look. Essentially, what I needed was a flexible craft stick.
I have used foam sheets for awhile now, mostly as simple outlines to define the areas of woods, hills, swamps, etc. so I am familiar with its properties, good and bad. On the positive side it is flexible and easy to cut and shape. It is about the same thickness as craft stick (a little thinner), but you can always buy thicker sheets, or even thinner sheets and glue them together.
The downside is their porous surface, making it harder to glue securely and to paint. It would probably be necessary to seal the foam before painting. But that might be possible with a thick primer.
I decided to experiment with a figure and try for a Napoleonic "high port arms" pose (which is more like the modern "present arms").
To start, I cut out the same basic shape and size that I used with craft sticks. I then glued the arms down using Elmer's Tacky Glue and waited for it to dry. I added a little Gorilla Glue Super Glue around the contact edges to add strength and also let that dry before moving on. The important thing was not to glue the arms too far forward, which I would have to do with wood.
After the arms were on solidly I glued the flat toothpick musket directly on the figure. It looks a little funny at this stage, but it ends up about right.
After the glue for the toothpick had dried, I put Tacky Glue on the underside of the right arm and pinned it to the body until the 'hand' reached the musket. With the left arm I only needed to glue the 'hand' directly to the musket.
This was relatively easy to do, with the only tedious part being cutting out the arms to length. In the end it is probably no more work than cutting and shaping the craft sticks. With a little bit of twisting and turning, I think making a figure with more of a modern port arms pose would be fairly.
Something like a defending pose would also be possible.
Cool figure, that one!
So, look for more figures using this technique. I have already used foam sheet for the bent foot of a kneeling troglodyte (lizard man) and it looks pretty convincing.
UPDATE: I painted the figure as it shows the shapes a little better.
It was while looking at Kenneth Van Pelt's Zulu-era soldiers on his Penny Whistle blog, that I noticed and liked the bends and poses of his pipe cleaner arms, but in the end did not like the "fuzzy" look. I started looking about for other materials to make the arms with that would give me that flexibility, yet give me more of the flat, craft stick look. Essentially, what I needed was a flexible craft stick.
I have used foam sheets for awhile now, mostly as simple outlines to define the areas of woods, hills, swamps, etc. so I am familiar with its properties, good and bad. On the positive side it is flexible and easy to cut and shape. It is about the same thickness as craft stick (a little thinner), but you can always buy thicker sheets, or even thinner sheets and glue them together.
The downside is their porous surface, making it harder to glue securely and to paint. It would probably be necessary to seal the foam before painting. But that might be possible with a thick primer.
I decided to experiment with a figure and try for a Napoleonic "high port arms" pose (which is more like the modern "present arms").
To start, I cut out the same basic shape and size that I used with craft sticks. I then glued the arms down using Elmer's Tacky Glue and waited for it to dry. I added a little Gorilla Glue Super Glue around the contact edges to add strength and also let that dry before moving on. The important thing was not to glue the arms too far forward, which I would have to do with wood.
After the arms were on solidly I glued the flat toothpick musket directly on the figure. It looks a little funny at this stage, but it ends up about right.
After the glue for the toothpick had dried, I put Tacky Glue on the underside of the right arm and pinned it to the body until the 'hand' reached the musket. With the left arm I only needed to glue the 'hand' directly to the musket.
This was relatively easy to do, with the only tedious part being cutting out the arms to length. In the end it is probably no more work than cutting and shaping the craft sticks. With a little bit of twisting and turning, I think making a figure with more of a modern port arms pose would be fairly.
Something like a defending pose would also be possible.
Cool figure, that one!
So, look for more figures using this technique. I have already used foam sheet for the bent foot of a kneeling troglodyte (lizard man) and it looks pretty convincing.
UPDATE: I painted the figure as it shows the shapes a little better.
Subscribe to:
Posts (Atom)
Contributors
Followers
Resources
Popular Posts
-
I'm very sorry to be making this post but I've just learned that Dale past away from a heart attack on November 5th. Most of my rela...
-
Today I wanted to talk about needlepoint mesh plastic canvases, a.k.a. "Granny Grating". Granny grating is a sheet of mesh plastic...
-
My goal was to scratch-build and paint a 28mm DBA Early Armenian (II/28(b)) army in twelve days, but I did not make it. More like 24 days, e...
-
You have been hearing me go on and on about casting small parts to save you the time and effort of hand-making each part, in addition to ens...
-
Hello Everyone [Matt here], Dale was nice enough to invite me to submit a guest entry on his Wooden Warriors blog. I was more than happy t...
-
I decided to use the rules Song of Drums and Shakos (SDS), which are simple to teach, but give the player tactical choices to make, so it n...
-
So the call went out on the Wargaming on a Budget forum for how to make helmets for ancient warriors, like a Greek Hoplite. I have been won...
-
Despite my talk about "leveling versus aiming" last time I could not help myself; I had to paint the firing figure aiming because ...
-
Soooooo, I learned on Friday that I am going to have to have eye surgery on Monday and have to keep my face parallel to the ground for at le...
-
One of the uniform elements that I really like is the Prussian pickelhaube from the Franco-Prussian War-era, similar to this one . In additi...
Labels I Use in Posts
- ancients (26)
- battle report (7)
- beads (7)
- casting (4)
- dark ages (6)
- dba (10)
- experiments (78)
- fantasy (77)
- gaming (41)
- laser (2)
- medieval (9)
- minimalist (12)
- napoleonic (44)
- news (3)
- painting (44)
- printed paper (9)
- products (15)
- review (14)
- sci-fi (14)
- Shadowsea (2)
- soldiers (164)
- steampunk (4)
- terrain (11)
- tools (14)
- toy (10)
- tutorial (79)
- vehicles (2)
- warriors (185)
- wooden (219)
- WWII (4)